You can perform sophisticated photo corrections and advanced adjustments using Photos.
Tools for improving image detail
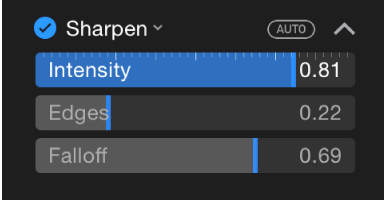
Sharpen: Sharpens photos, making edges crisper and better defined.
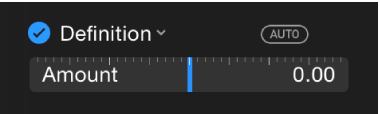
Definition: Changes midtone definition and local contrast.
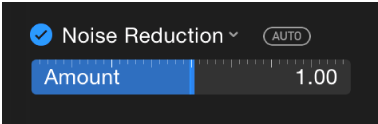
Noise Reduction: Reduces graininess and speckles, especially in photos taken in low light.
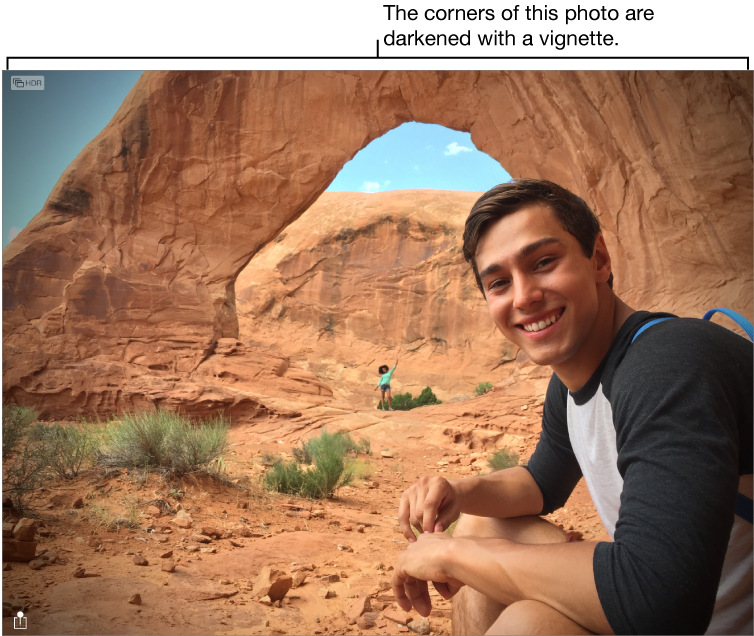
Vignette: Lightens or darkens the edges of photos, bringing attention to the center of the image.
Advanced adjustments
White Balance: Adjusts the overall color cast of photos to compensate for various lighting conditions.
Levels: Adjusts the tonal range and contrast of the image.
Sharpen a photo
The Sharpen adjustment changes photos by making edges crisper and better defined.
Double-click a photo, then click Edit in the toolbar.
Click the Adjust button .
In the Adjustments pane, click the Add button and choose Sharpen.
Click the down arrow on the right to display all the sliders, then drag them to adjust the sharpness.
Intensity: Adjusts the strength of the sharpened edges.
Edges: Sets the threshold for which groups of pixels are edges and which ones aren’t.
Falloff: Makes the sharpening effect look more or less prominent. Increasing the falloff value makes the sharpening more severe; decreasing it softens the effect.
Change photo definition
You can change the definition settings of a photo to add contour and shape to photos as well as midtone definition and local contrast.
Double-click a photo, then click Edit in the toolbar.
Click the Adjust button .
In the Adjustments pane, click the Add button and choose Definition.
Drag the Definition slider until you’re satisfied with the results.
Reduce noise in a photo
Photos taken in low light may appear with a graininess or speckles, referred to as noise. You can reduce or eliminate noise in photos.
Double-click a photo, then click Edit in the toolbar.
Click the Adjust button .
In the Adjustments pane, click the Add button and choose Noise Reduction.
Drag the Noise Reduction slider until you're satisfied with the results.
Add a vignette to a photo
You can change the look of a photo by darkening its edges with a vignette. The vignette changes the focal point of an image, emphasizing the center of the image. You can adjust the darkness and size of a vignette to create the look you want, and soften the vignette for a less dramatic effect.
Double-click a photo, then click Edit in the toolbar.
Click the Adjust button .
In the Adjustments pane, click the Add button and choose Vignette.
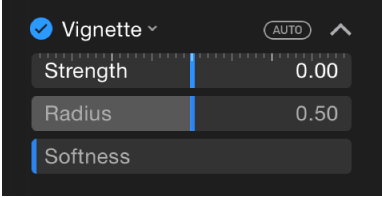
Click the down arrow on the right to display all the sliders, then drag them to adjust the vignette.
Strength: Darkens or lightens the vignette.
Radius: Changes the size of the vignette.
Softness: Changes the opacity of the vignette, making it more or less pronounced.
Adjust white balance
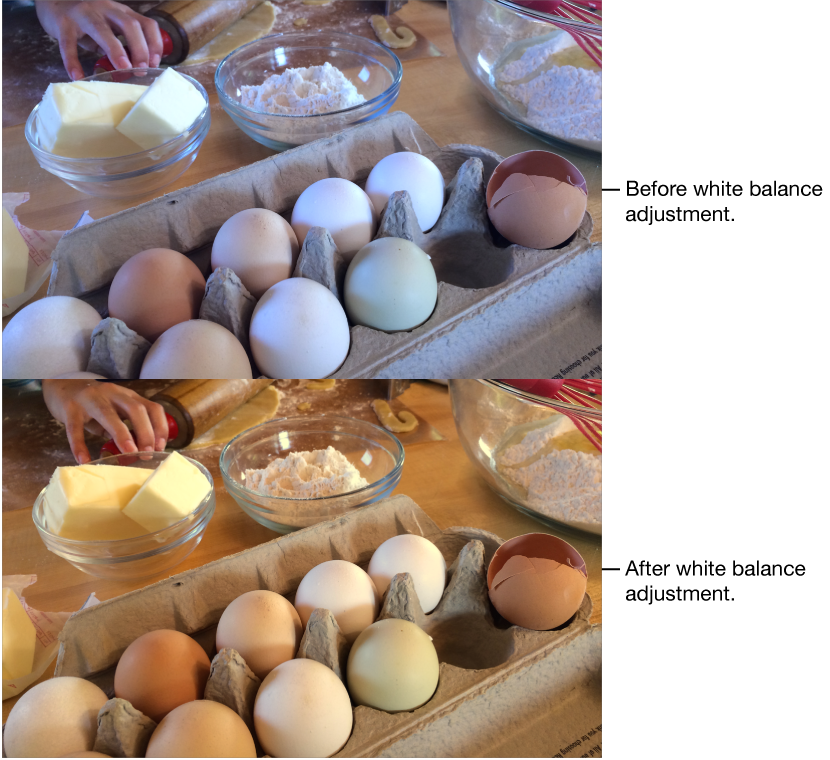
If there’s an area in a photo that you know should be white or gray, but appears off-color, you can balance the photo’s overall color (known as color cast). Sometimes photos may have an undesirable cast due to lighting conditions—for example, a photo may have a yellow or orange cast from the light fixtures in the location where the photo was taken. By changing white balance, you can adjust the white areas in a photo to remove the color cast and make them appear more white.
Double-click a photo, then click Edit in the toolbar.
Click the Adjust button .
In the Adjustments pane, click the Add button and choose White Balance.
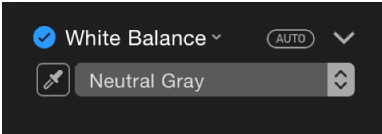
Click the pop-up menu and choose the type of white balance correction you’d like to make. Then click the Auto button to automatically correct those colors, or click the Eyedropper button and click the eyedropper in a corresponding area of the photo.
Neutral Gray: Balances the warmth of an image based on natural gray.
Click the eyedropper in a neutral gray area in the photo to automatically adjust the gray areas of your photo.
Skin Tone: Balances the warmth of an image based on skin tones.
Click the eyedropper in a person’s skin in the photo to automatically adjust the skin tones of your photo.
Temperature/Tint: Balances the warmth of an image by adjusting color temperatures (blue-to-yellow) and tint (green-to-magenta).
Click the eyedropper in a neutral gray area in the photo to automatically adjust the temperature and tint of grays of your photo.
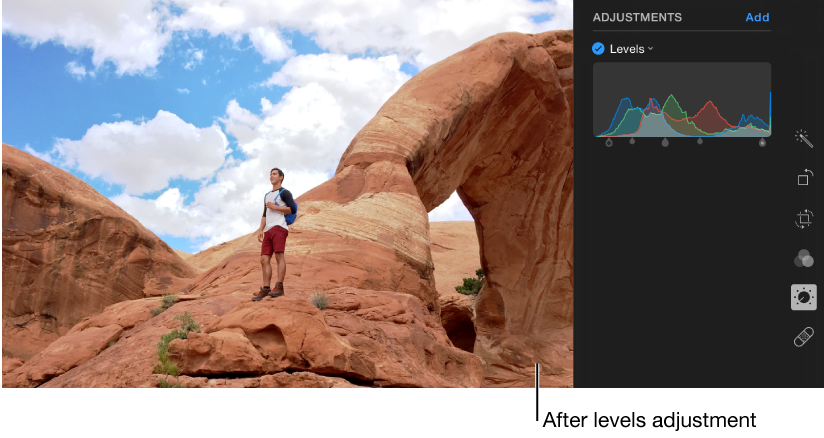
Adjust levels
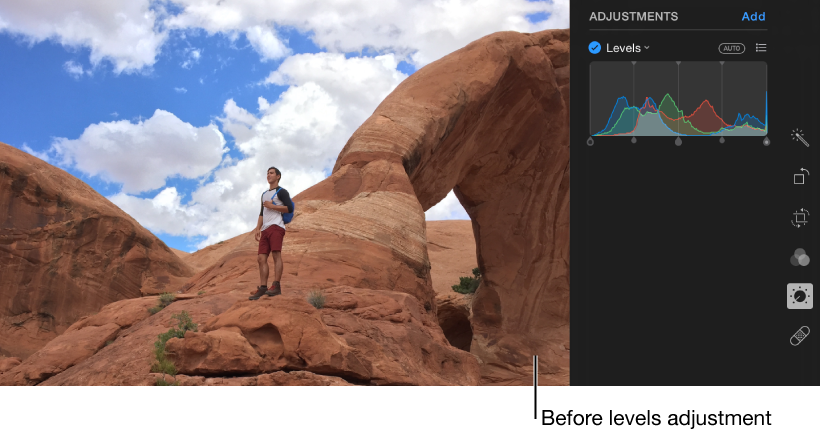
You can adjust the levels in a photo to control the tonal range and contrast of the photo. You can adjust settings for the black point, shadows, midtones, highlights, and white point. You can also change the look of specific colors (red, green, and blue).
Double-click a photo, then click Edit in the toolbar.
Click the Adjust button .
In the Adjustments pane, click the Add button and choose Levels.
Do any of the following:
Auto correct the levels of a photo: Hold your pointer over the histogram and click the Levels button at the top right. Choose Luminance, RGB, or the color you want to change, then click the Auto button.
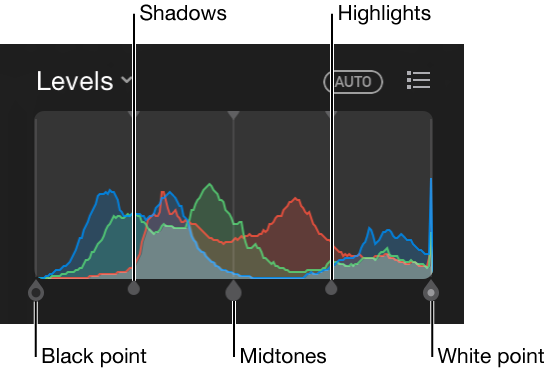
Manually adjust levels: Drag the handles of the histogram to make the adjustments you want.
Black point: Adjusts the point at which black areas become completely black (no detail can be seen).
White point: Adjusts the point at which white areas are completely white.
Shadows: Adjusts the lightness or darkness of shadows to reveal the details you want.
Highlights: Adjusts the highlights to the brightness you want.
Midtones: Adjusts the lightness or darkness of midtone areas of the photo.
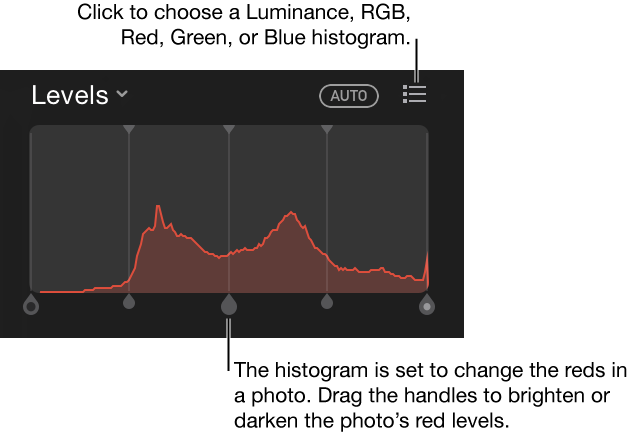
Change the color cast of a specific color in a photo: Hold your pointer over the histogram and click the Levels button at the top right, then choose the color you want to change. Drag the handles to adjust the brightness or darkness of that color in the photo.
Change the histogram to display Luminance values (instead of RGB values): Hold your pointer over the histogram and click the Levels button at the top right, then choose Luminance. For example, you might want to change the histogram to luminance values when working with black and white photos. The histogram handles perform the same functions as when the RGB histogram appears.
Note: You can also drag the top handles of the level controls to change the range of adjustment. For example, to adjust only the lightest of highlights, move the top handle further to the right. To fine-tune an adjustment, hold down the Option key and then drag the bottom handle. This moves both bottom and top handles in unison until you get the results you want.
 .
. on the right to display all the sliders, then drag them to adjust the sharpness.