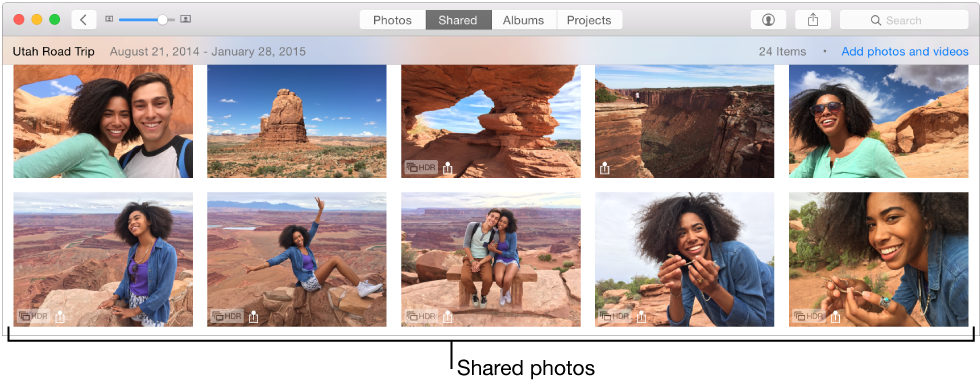
It’s easy to create a shared album to share your photos and video clips.
Select the photos and video clips you want to share.
Click the Share button
in the toolbar and choose iCloud Photo Sharing, then click New Shared Album.
Type a name for the shared album, then type the email addresses of the people you want to share the album with.

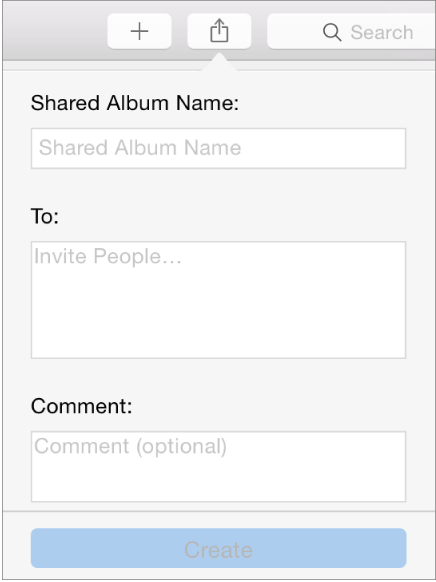
If you want subscribers to be able to view the shared album from an iOS device, be sure to use the email addresses associated with their iCloud accounts.
Click Create.
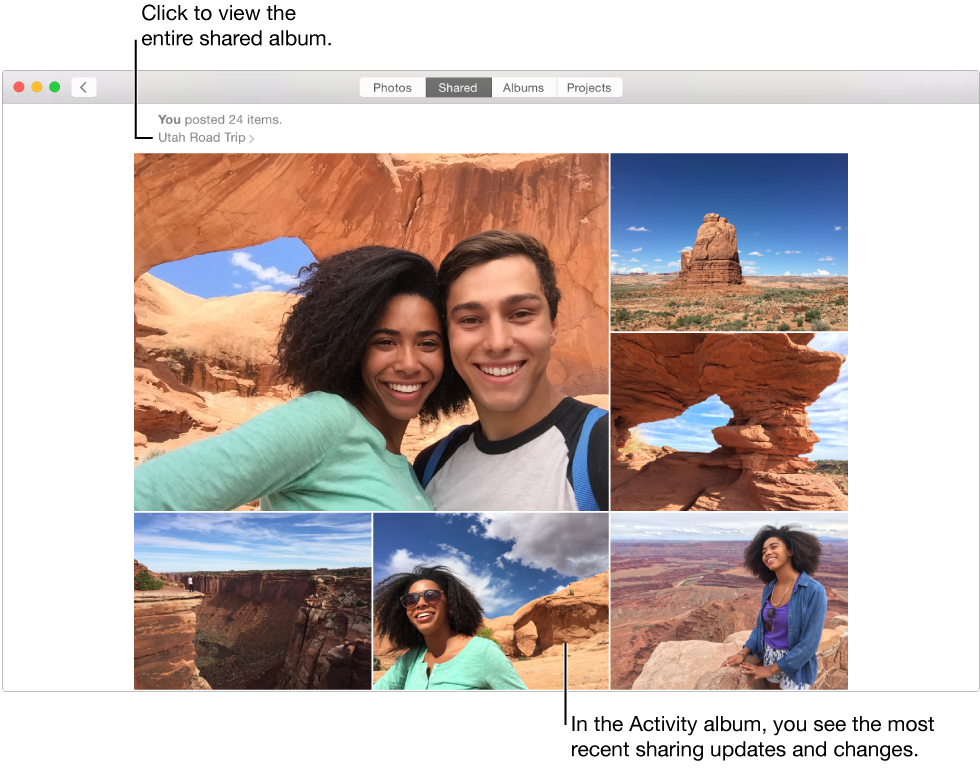
Your invitees are sent an email asking them to subscribe to your shared album.
Click Shared in the toolbar.
Photos opens the Activity album, which shows the latest updates to your shared albums.
Click
to see all your shared albums, then double-click an album to view it.

To stop sharing a photo album, delete it.
WARNING: When you delete a shared album, it’s immediately removed from your subscribers’ devices. If you think your subscribers might want to keep some of the photos or video clips, you should alert them to save the items before you delete the shared album.
Click Shared in the toolbar.
Do one of the following:
Select the shared album you want to stop sharing, then press Command-Delete.
Double-click a shared album, click
in the toolbar, then click Delete Shared Album.
To see the latest activity in your shared albums—including photos that have been recently added and who added them—use the Activity album, in your shared albums.

Click Shared in the toolbar.
Do one of the following:
If the Activity album is open: Scroll to view the changes.
If you see all your shared albums: Double-click the Activity album to open it.
If Photos displays an open shared album: Click
to close the album, then double-click the Activity album to open it.