Format calendar text

You can change the appearance of the text on a calendar page by choosing different font options. You can also add text to any date.

Format text on a calendar page

  1. Click Projects in the toolbar, then double-click the calendar.

  2. Double-click the page that contains the text you want to format.

  3. Select the text, then do one of the following:

    • Choose Edit > Font > Show Fonts, then select the font options you want.

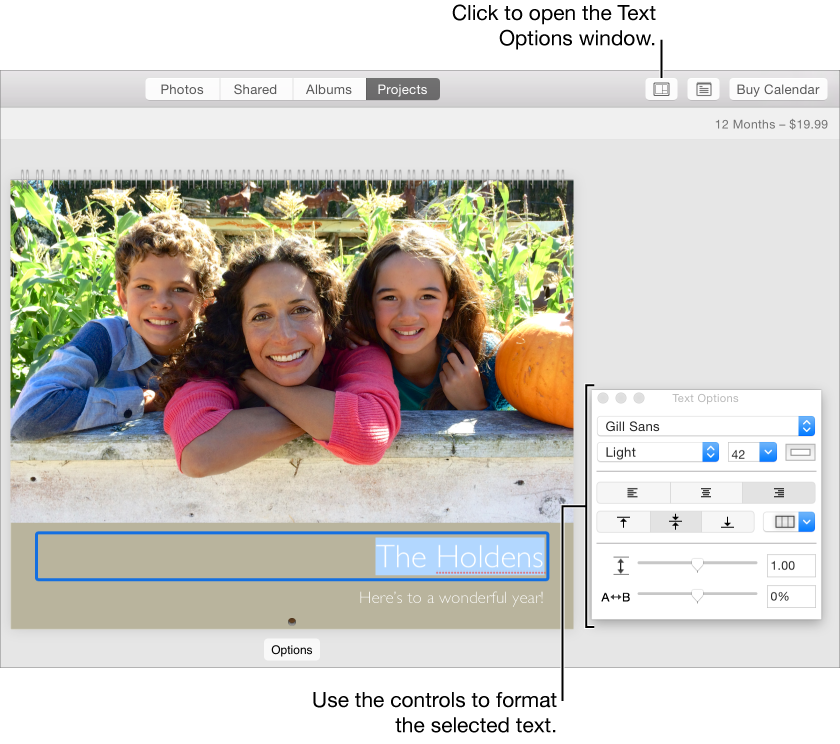
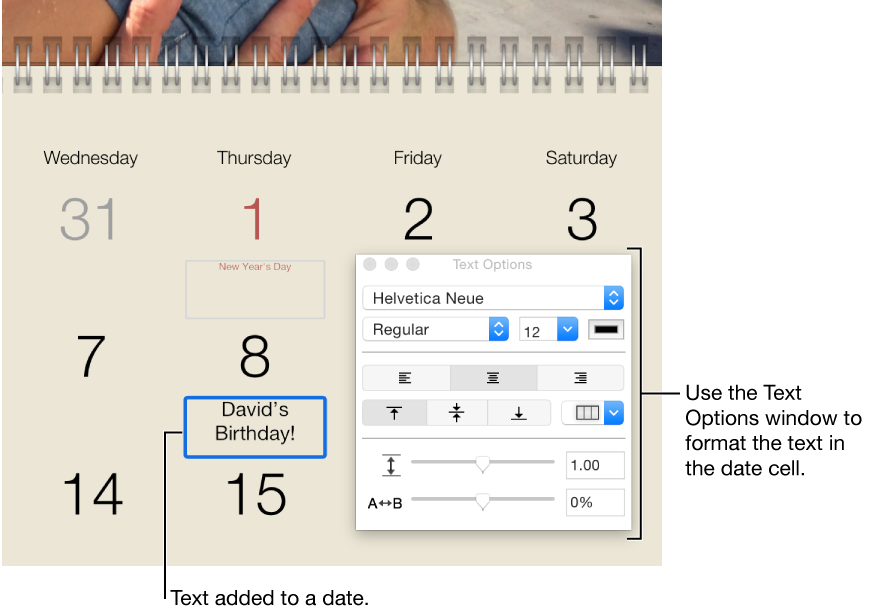
    • Click the Options button Options button in the toolbar, then format the text using the controls in the Text Options window.

      A photo with text selected under it and the Text Options window on the right

Add text to a date

  1. Click Projects in the toolbar, then double-click the calendar.

  2. Double-click a page, then click under the date you want to add text to.

  3. Enter text in the text field.

    IA calendar date with text added to it, and the Text Options window on the right

    To format the text, double-click the text to select it, then use the controls in the Text Options window.

Add a caption to a photo in a date

  1. Click Projects in the toolbar, then double-click the calendar.

  2. Double-click a page, then double-click the date that contains the photo you want to add text to.

    Tip:  You can use the Zoom slider in the toolbar to increase the size of the calendar page so that you can easily make changes.

  3. Click the Caption pop-up menu in the Photo Options window and choose a location for the caption.

    Photo Options window with Caption pop-up menu at the bottom
  4. Enter your caption text in the text field.

If you see an alert (red triangle) on a calendar page

If you see a red triangle with an exclamation point while working on a calendar, there’s text that doesn’t fit in the available space, either because the font is too large or the text uses too many characters.

Triangle alert icon

To fix an alert, do one of the following: