
You can fill shapes and text boxes with an image, a solid color, or a gradient (two or more colors that blend into one another).
Tap an object, then tap ![]() .
.
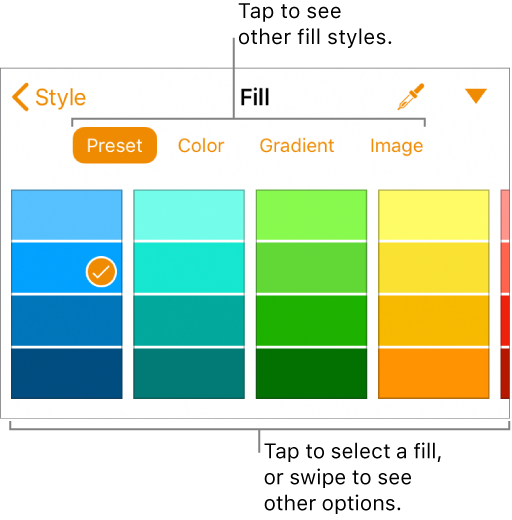
Tap Style, then tap Fill.
Choose one of the following:
A color or gradient designed to go with the template: Tap Preset, swipe left or right to see all choices, then tap a color.
Any color: Tap Color, swipe up or down to see all choices, then tap a color.
To preview colors in the object, touch and hold a color, then drag across the grid. A color label appears for each previewed color to help you reproduce an exact match. Release your finger to select a color.
A two-color gradient fill: Tap Gradient, tap Start Color or End Color, then tap a color.
To switch the gradient direction, tap Flip Color. To change the gradient angle, drag the Angle slider.
A color from elsewhere on the page: Tap ![]() , then tap any color outside of the selected object.
, then tap any color outside of the selected object.
To preview colors in the object, touch and hold a color on the page, then drag across other colors on the page. Release your finger to select a color.
Tap ![]() to close the controls.
to close the controls.
Tap a shape or text box, then tap ![]() .
.
Tap Style, then tap Fill.
Tap Image, tap Change Image, then do one of the following:
Tap a photo.
Tap Take Photo.
Tap “Insert from” to choose an image from iCloud Drive.
If the image doesn’t look the way you expected or you want to change how the image fills the object, tap an option:
Original Size: Places the image inside the object without altering the image’s original dimensions. To resize the image, drag the Scale slider.
Stretch: Resizes the image to fit the object’s dimensions, which might change the image’s proportions.
Tile: Repeats the image inside the object. To resize the image, drag the Scale slider.
Scale to Fill: Makes the image larger or smaller to leave no space in the object.
Scale to Fit: Resizes the image to fit the object’s dimensions, but maintains the image’s proportions.
To create a tinted image, turn on Color Overlay and tap Fill to select a tint color.
To make the tint more or less transparent, drag the Opacity slider.
Tap ![]() to close the controls.
to close the controls.
Tap a shape or text box, then tap ![]() .
.
Tap Style, then tap Fill.
Tap Preset, swipe left to the black and white options, then tap No Fill.
Tap ![]() to close the controls.
to close the controls.