
You can add shadows and outlines to text to make it stand out.
Select the text you want to change.
To change all of the text in a text box or table cell, select the text box or table cell.
In the Format ![]() sidebar, click the Text tab, then click the Style button near the top of the sidebar.
sidebar, click the Text tab, then click the Style button near the top of the sidebar.
In the Font section, click ![]() , then select or deselect the Outline checkbox.
, then select or deselect the Outline checkbox.

If you add an outline, use the controls to change its style, color, and width.
Tip: To create an outline effect with no color inside, click the Font Color pop-up menu below Character Styles, then choose No Fill.
Select the text you want to change.
To change all of the text in a text box or table cell, select the text box or table cell.
In the Format ![]() sidebar, click the Text tab, then click the Style button near the top of the sidebar.
sidebar, click the Text tab, then click the Style button near the top of the sidebar.
In the Font section, click ![]() , then select or deselect the Shadow checkbox.
, then select or deselect the Shadow checkbox.
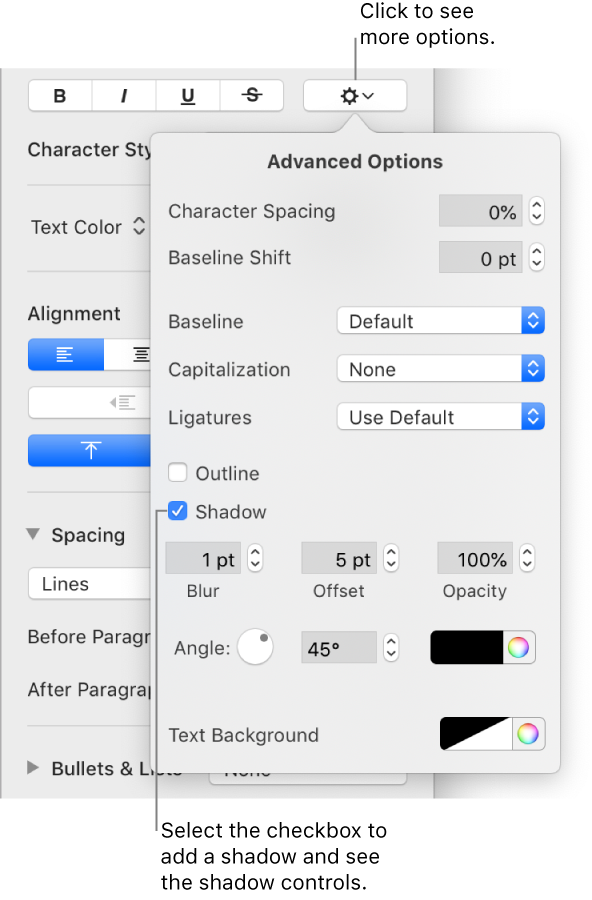
If you add a shadow, adjust its appearance using the following controls:
Blur: Click the arrows to increase or decrease the sharpness of the shadow.
Offset: Click the arrows to change the amount of space between the text and the shadow.
Opacity: Make the shadow more or less transparent.
Angle: Drag the Angle wheel to change the direction of the light source. You can also enter a value in the field next to the wheel.
Color: Click the left color well to choose a color for the shadow that coordinates with other template elements. To choose any color, click the color wheel on the right.