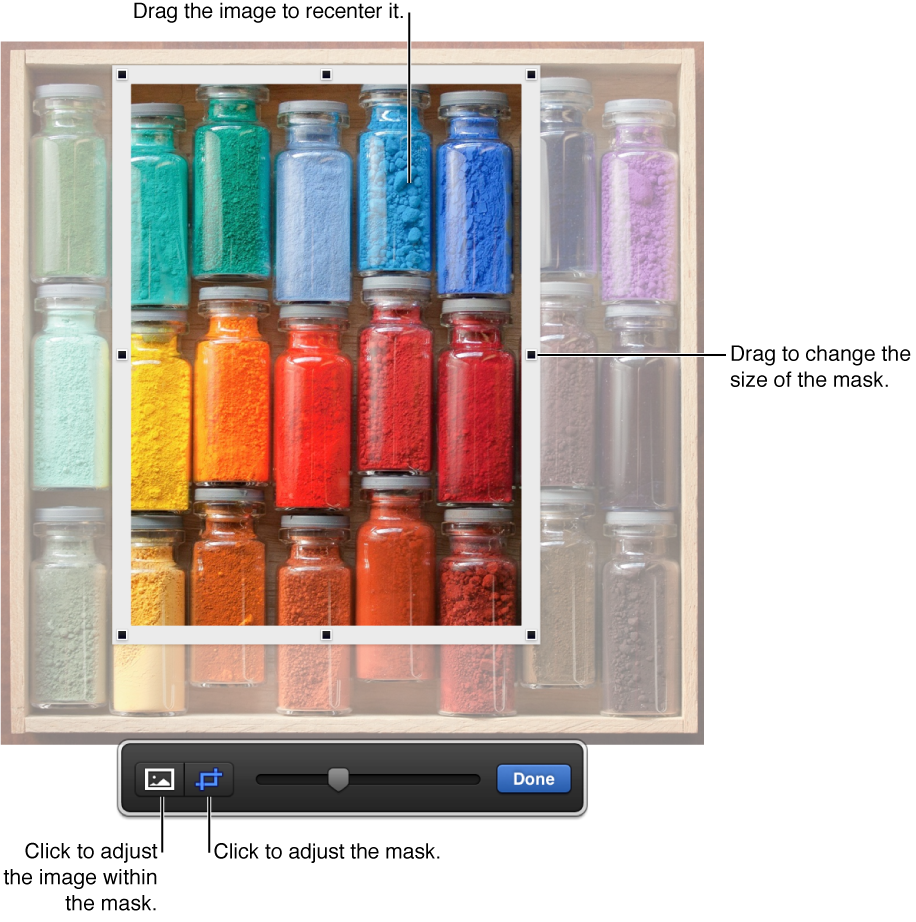
Add and edit images

You can add photos and graphics to any sheet, then change their appearance in a number of ways.

Numbers provides many predesigned image styles—which include coordinating borders, reflections, and shadows—that are designed to match a spreadsheet’s template. You can quickly edit an image by applying one of these styles to it, or you can customize its appearance by applying your own border, shadow, and more. You can also crop an image by masking out parts you don’t want, and make adjustments to its background and exposure.

Add an image

Mask (crop) a photo

You can hide unwanted portions of an image without cropping the image itself. Use the mask controls to frame just the parts of the image you want to be visible.

  1. Double-click the image.

    The mask controls appear. The default mask is the same size as your image.

  2. Use the controls to change which parts of the image are visible.

    Mask controls over a photo

  3. Click Done.

You can change the mask at any time by double-clicking the image to reveal the controls. Or, you can select the image, then click Edit Mask in the Image pane of the Format inspector.

Remove background and other elements from a photo

Use the Instant Alpha tool to make parts of an image transparent. This feature is useful for removing an unwanted background or color from an image.

  1. Select the image.

  2. In the Image pane of the Format inspector, click Instant Alpha.

  3. Click the color you want to remove, then drag slowly over it.

    As you drag, the selection grows to include areas that use similar colors. Click and drag multiple times to remove multiple colors.

    • Remove all instances of the color (even in other parts of the photo): Hold down the Option key while you drag.

    • Add colors back to the image: Hold down the Shift key while you drag.

  4. Click Done.

Adjust exposure, saturation, and other image settings

  1. Select the image.

  2. In the Image pane of the Format inspector, use the controls to make adjustments:

    • Exposure: Changes the overall lightness or darkness of the entire image.

    • Saturation: Changes the richness of color in the image. Dragging to the right makes the colors richer or more vibrant.

    • Enhance: Automatically adjusts the image by spreading the red, green, and blue tones evenly across the histogram.

  3. To see the image histogram and adjust more advanced features like levels, gamma, temperature, and tint, click Advanced image button.

    Adjust Image window showing histogram

To restore the original settings, click Reset Image.

See also
Resize, rotate, and flip an object
Align and position objects
Layer, group, and lock objects