Add an existing image
Do one of the following:
Tap where you want to insert the image, tap
 , then tap
  .
.Tap
 in the bottom-right corner of an image placeholder to see the photos available on your device.
Tap an album or tap “Insert from” below the albums.
Tap the photo you want to add.
If you’re inserting a photo from iCloud or another service, you need to tap folders to find the image.
Tap the sheet to close the pop-up menu.
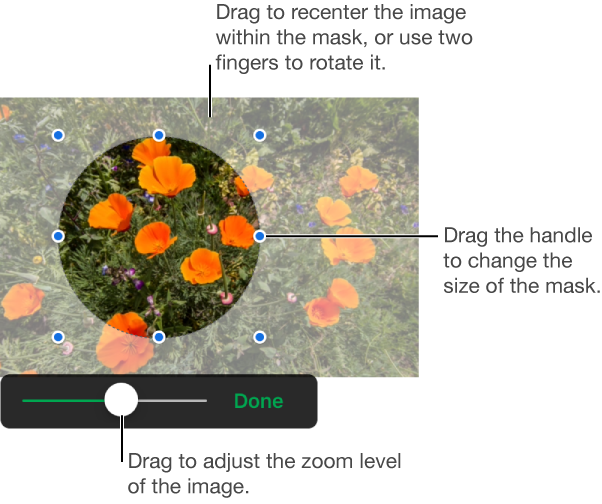
Drag any selection handle to resize the image.