
If you’re using upgraded iCloud notes or notes that are stored on your Mac, you can lock notes you want to keep private, so only people who know the password can view them. You create a single password, and then use it to lock or unlock any note. If your Mac has a Touch Bar, you can also use Touch ID to unlock your notes.
You can’t lock a shared note, or a note that has a video, audio file, PDF, or document attached (only images, sketches, maps, or web attachments can be included in a locked note). You also can’t lock a note if your iCloud account uses a Managed Apple ID. For more information, see What are Managed Apple IDs?
WARNING: If you forget your password and can’t use Touch ID to unlock your notes, you can’t view your locked notes.
To lock notes, you need to set up a single password, used for both your iCloud notes and the notes stored on your Mac.
Choose Notes > Preferences, then click Set Password.
Enter a password in the Password field, then enter it again in the Verify field.
Enter a hint to help you remember the password.
The hint appears if you enter the wrong password three consecutive times.
Important: It’s highly recommended that you add a hint. If you forget your password, and you can’t use Touch ID to unlock your notes, you won’t be able to view your locked notes.
Click Set Password.
If your Mac has a Touch Bar, select Use Touch ID to be able to use your fingerprint to unlock your notes.
Once you set up a password for your upgraded iCloud notes or the notes on your Mac, you can lock your notes.
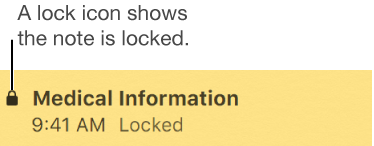
Lock a note: Select the note you want to lock, choose File > Lock This Note, then enter the password (or use Touch ID).
If you’ve already entered the password during this session of Notes, you don’t need to enter the password.
View a locked note: Select the locked note, then enter the password (or use Touch ID).
After you enter your password, all locked notes are unlocked, so you can easily view them without entering the password as long as you’re working in Notes.
Remove the lock from a note: Select the locked note, choose File > Remove Lock, then enter the password (or use Touch ID).
If you’ve already entered the password during this session of Notes, you don’t need to enter the password.
Relock all locked notes: Choose Notes > Close All Locked Notes.
If you don’t relock notes, they’re locked automatically after a period of inactivity or when you close Notes.
Choose Notes > Preferences, then click Change Password.
Enter your current password in the Old Password field.
Enter your new password in the New Password field, then enter it again in the Verify field.
Enter a hint to help you remember the password.
The hint appears if you enter the wrong password three consecutive times.
Important: It’s highly recommended that you add a hint. If you forget your password, and you can’t use Touch ID to unlock your notes, you won’t be able to view your locked notes.
Click Change Password.
All locked notes are updated to use the new password.
You should only reset your password if you’ve forgotten your current password, but still want to lock your future notes. Notes that are already locked still have the password in effect when you locked them.
Tip: It’s highly recommended that you change the password (see “Change the password,” above) rather than reset it. When you reset the password, you have to manage multiple passwords, and you can’t easily tell which note is locked with which password.
Choose Notes > Preferences, click Reset Password, then click OK to confirm.
If this is an iCloud account, enter your iCloud password, then press Return.
Click Reset Password to verify that you want to reset the password.
Enter a password in the Password field, then enter it again in the Verify field.
Enter a hint to help you remember the password.
The hint appears if you enter the wrong password three consecutive times.
Important: It’s highly recommended that you add a hint. If you forget your password, and you can’t use Touch ID to unlock your notes, you won’t be able to view your locked notes.
Click Set Password.