After adding a preset replicator or creating a custom replicator, you modify it further by replacing its source image, adjusting cell opacity, or changing the replicator pattern’s size or position in the canvas.
After adding a preset replicator to your project, you can customize it by replacing its source image.
Locate the file you want to use as the replacement graphic and add it to your project.
Do one of the following:
In the Layers list, drag the new layer to the replicator cell you want to replace.
In the Replicator Inspector, drag the new layer to the Object Source well of the replicator cell you want to replace.
Note: If the cell layer is not visible, click the disclosure triangle next to the replicator layer.
When the pointer becomes a curved arrow, release the mouse button.
The original source image is replaced with the new image.
Optional: Hide the new source layer by deselecting its activation checkbox in the Layers list.
The cells based on this layer remain in your replicator pattern, but the source layer itself is hidden in the canvas.
You can adjust the opacity of individual elements in a replicator by modifying the cell parameters in the Replicator Cell Inspector or by modifying the source layer’s opacity in the Properties Inspector.
Do one of the following:
Select the cell in the Layers list, then adjust the Opacity tag in the gradient editor in the Replicator Cell Inspector (or change Color Mode to Colorize and adjust the Opacity parameter in the Color controls).
Select the original source layer—not the replicator cell—and change its opacity in the HUD or Properties Inspector.
The elements in the pattern are stacked according to their order in the Layers list and Timeline. In a replicator with multiple cells, changing cell stacking order changes the appearance of the pattern in the canvas.
In the Layers list, drag a cell to a new position above or below other cells in the replicator.
In the Layers list, select the replicator to adjust.
In the canvas toolbar, click the transform tools pop-up menu, then choose Adjust Item.
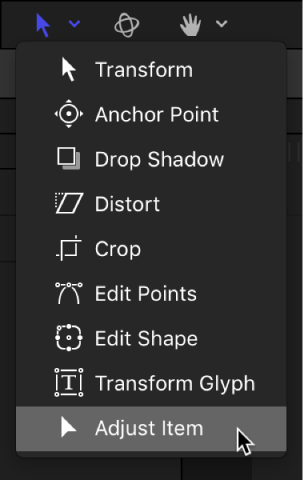
The replicator onscreen controls appear in the canvas. The onscreen controls vary depending on the shape of the replicator (chosen from the Shape pop-up menu in the Replicator Inspector).
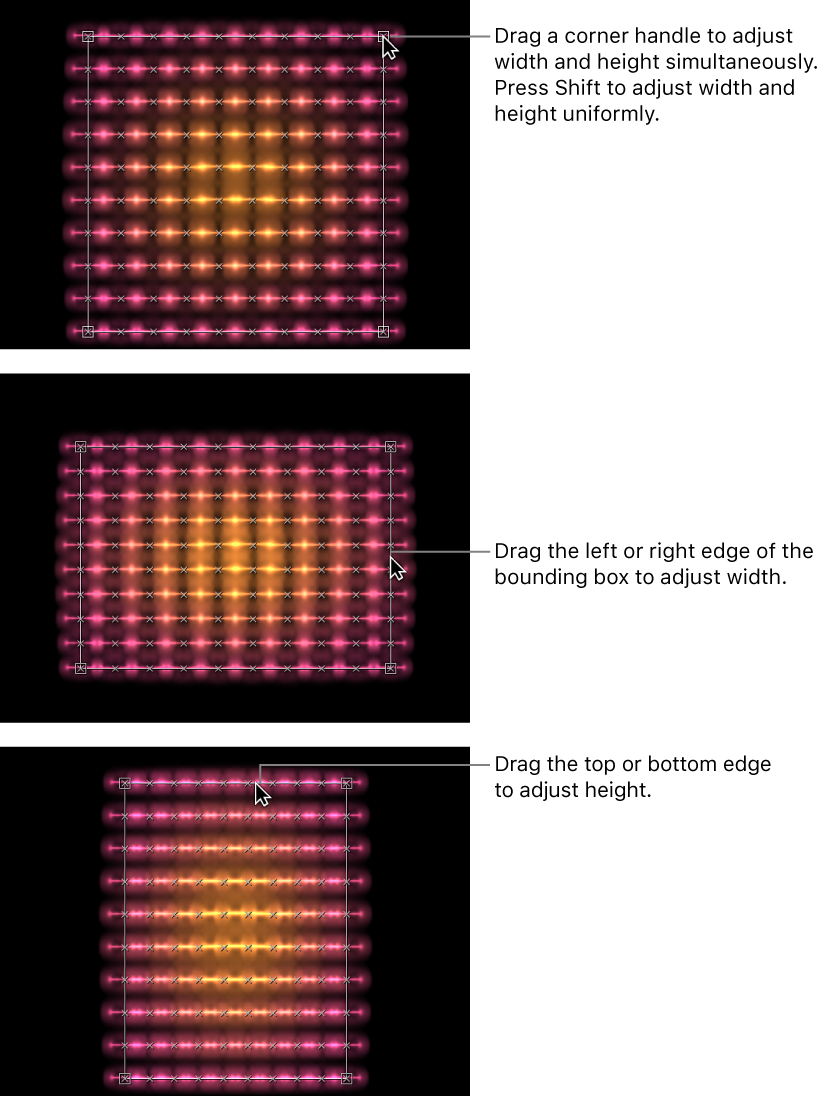
To resize the replicator, drag the replicator shape’s outline in the canvas.
To reposition the replicator, drag inside the shape (but not directly on the outline) in the canvas.
The size or position of the replicator shape is adjusted. For example, if the shape is a spiral or circle, dragging the shape outline changes the Radius parameter value. Dragging inside the shape (but not directly on the outline) repositions the replicator in the canvas.

If the replicator shape is a rectangle, dragging a corner or edge of its bounding box changes the Size parameter value. Depending on which handle you drag, you can constrain the transform to width, height, or depth (in a box-shaped replicator). Or you can drag a corner handle to scale the replicator in multiple dimensions simultaneously.