
Every 360° video is recorded with a default orientation—a field of view that the viewer sees when they look “straight ahead” (without turning their head in a VR headset or navigating a 360° viewing window). You can change the default orientation of 360° video by using the 360° Reorient filter, or by adjusting the camera parameters.
Additionally, as you navigate your 360° video by tilting, panning, or rotating the camera, you may lose track of the 360° media’s horizon line. You can correct the horizon using the Reorient filter.
Important: Changing the default orientation of 360° media using the 360° Reorient filter or by adjusting the camera Transform parameters significantly affects on the final output of your project.
Use the 360° Reorient filter to rotate the 360° sphere along the X, Y, or Z axis to change the default orientation of the 360° media.
In the Layers list, select the 360° media you want to reorient.
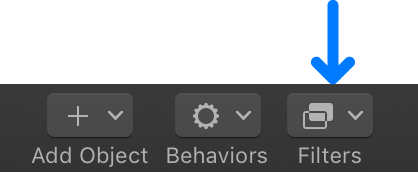
In the toolbar, click Filters, then choose 360° > 360° Reorient.
In the Filters Inspector, adjust the reorient parameters:
Tilt (X): Rotates the image along the X (horizontal) axis.
Pan (Y): Rotates the image along the Y (vertical) axis.
Roll (Z): Rotates the image along the Z (depth) axis.
Mix: Sets the percentage of the original image to be blended with the reoriented image.
You can also direct the viewer’s focus to a particular area of the 360° footage by adjusting the Transform parameters of the camera. Using these controls, rather than the 360° Reorient filter, is handy for reorienting multiple layers of 360° video simultaneously.
In the layers list, select the camera.
In the Properties Inspector, click the Rotation disclosure triangle to reveal the X, Y, and Z parameters.
To adjust the rotation of the camera, do any of the following:
Adjust the X Rotation dial (or value slider) to tilt the camera up or down (around the X axis).
Adjust the Y Rotation dial (or value slider) to pan the camera left or right (around the Y axis).
Adjust the Z Rotation dial (or value slider) to roll the camera clockwise or counterclockwise (around the Z axis).
To reset the camera, click the Animation menu (the down arrow that appears on the right when you move the pointer over the parameter row), then choose Reset Parameter.
Note: For more information on working with cameras, see 3D cameras overview.
It’s possible to create cinematic camera moves in your 360° projects using keyframes or behaviors to animate the camera or the 360° Reorient filter parameters over time. However, this may not be appropriate given that a 360° video is fully interactive and navigable by the viewing audience at all times.
Tip: The 360° Reorient filter can be used in normal (non-360°) projects to reframe an image.