
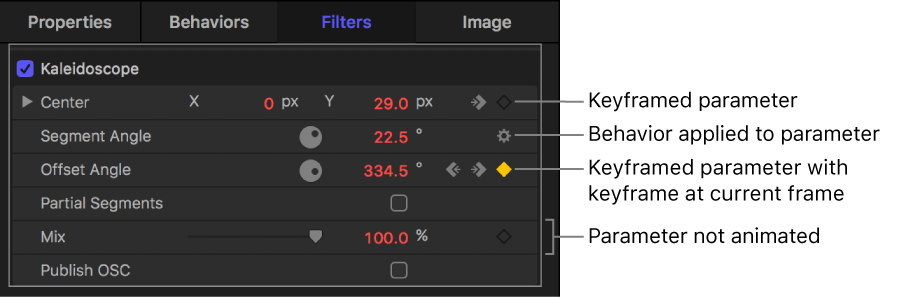
In the Inspector, basic keyframe controls are available on the right side of animatable parameter rows. These controls allow you to determine the status of a parameter at a glance, to add or delete keyframes at the current playhead, and to navigate to next and previous keyframes in the Timeline
At the far-right side of a parameter row is the Add/Delete Keyframe button (the diamond outline). Moving the pointer over the Add/Delete Keyframe button reveals a plus sign (+) inside the diamond. Click the button to place a keyframe for that parameter at the current frame.
After you add a keyframe, the diamond turns solid gray. Moving the pointer over a solid gray diamond (a keyframe) reveals a minus (–) sign inside the diamond. Click the button to delete the keyframe for that parameter at the current frame.
If a parameter is keyframed at the current frame, as well as before and after the current frame, additional navigation controls appear:
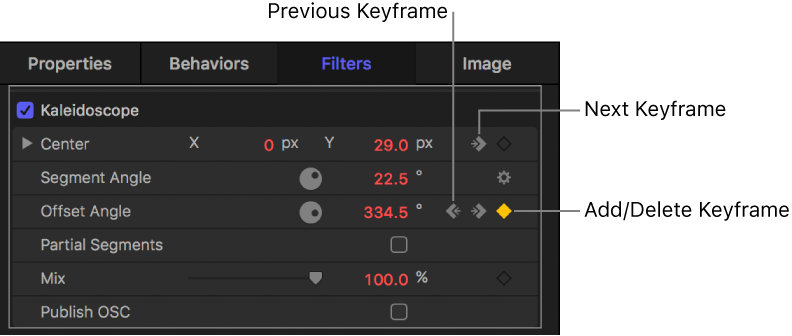
Previous Keyframe: A partial diamond with a left-facing arrow appears when there’s a keyframe in the Timeline to the left of the playhead position. Click this control to move to a previous keyframe in the Timeline.
Next Keyframe: A partial diamond with a right-facing arrow appears when there’s a keyframe to the right of the playhead position. Click this control to move to the next keyframe in the Timeline.
Add/Delete Keyframe: A diamond-shaped button with several states. A diamond outline indicates that there’s no keyframe at the current frame. Click this button to add a keyframe at the playhead position. When you add a keyframe, the diamond turns gray, indicating that there’s a keyframe at the current frame. Clicking the gray diamond deletes the keyframe.