
You can move or delete keyframes that are displayed in the Timeline. You can also display the animation curve for a selected keyframe, using the Keyframe Editor.
For more information on the Keyframe Editor, see Keyframing overview.
In the upper-right corner of the Timeline, click the Show/Hide Keyframes button.

When the Show/Hide Keyframes button is highlighted, keyframes appear below objects in the track area.
Note: Don’t confuse the Show/Hide Keyframes button with the Show/Hide Keyframe Editor button, located on the right side of the timing toolbar. The former turns the display of keyframes in the Timeline track area on and off; the latter expands and collapses the Keyframe Editor in the Timing pane.
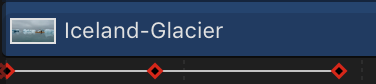
Moving a keyframe in the Timeline modifies the keyframe’s position in time (but not its value).
Drag the keyframe to the left or right.
When selected, the keyframe appears white.
To change a keyframe’s value (as opposed to its position in time), do one of the following:
Control-click the keyframe, choose the parameter to adjust from the shortcut menu, enter a new value, then press Return.
Use the Keyframe Editor, which lets you change both the value and interpolation of the keyframe.
In the Timeline, select the object that contains the keyframes you want to copy.
In the Timeline track area, select or Shift-select keyframes, then choose Edit > Copy (or press Command-C).
In the Timeline track area, select the target object for the copied keyframes, then choose Edit > Paste (or press Command-V).
In the Timeline track area, select the keyframe or keyframes to delete, then do one of the following:
Press Delete.
Control-click a selected keyframe, then choose Delete Keyframes from the shortcut menu.
In the Timeline track area, Control-click a keyframe, then choose Delete All Keyframes from the shortcut menu.
Control-click a keyframe on a track, then choose Show in Keyframe Editor from the shortcut menu.
The Keyframe Editor appears underneath the Timeline, showing the animation curve and a new, untitled curve set.