
For more control over tracking in a Match Move behavior, use the four-corner option, which lets you track four points on a source clip and then apply the recorded motion to the four corners of a destination object. This process is known as corner pinning.
Tip: If the position, size, or angle of the destination object is radically different from that of the source pattern (an angled TV screen or picture frame, for example) you may need to adjust the foreground object before you apply the Match Move behavior. You can reorient the foreground object in the canvas using the Distort tool (available in the transform tools pop-up menu in the canvas toolbar).
This workflow is ideal for a four-corner pin in which the transformed or pinned image is the same size as the background reference pattern it’s being tracked to. In the following example, a foreground image is pinned to a background clip of a picture frame.
Drag the playhead to the frame where you want to start the track analysis, then apply a Match Move behavior to the foreground object.
Note: If you apply the Match Move behavior to a 2D group (rather than an individual layer in a group), make sure the Fixed Resolution checkbox is selected in the Group Inspector. When you apply the Match Move behavior to a 3D group, the Four Corners option is not available. To corner-pin a 3D group, select the Flatten checkbox in the Group Inspector.
In the Behaviors Inspector, click the Type pop-up menu, then choose Four Corners.
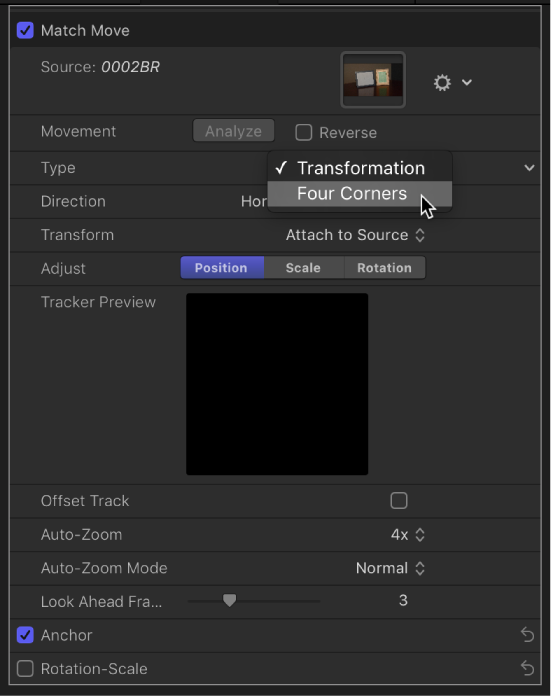
In the canvas, a tracker appear at each corner of the foreground object’s bounding box. In the Inspector, the Anchor and Rotation-Scale checkboxes are replaced with the Top Left, Top Right, Bottom Right, and Bottom Left checkboxes; each checkbox activates or deactivates a tracker in the canvas.
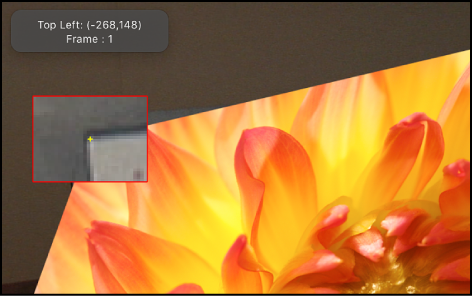
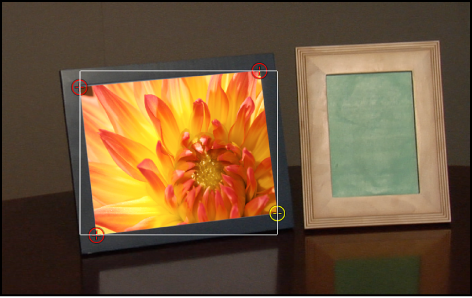
In the canvas, drag each tracker to a corner of the background element (in this example, the corners of the picture frame).
As you drag a tracker, a magnified inset appears to help you position each tracker.
Note: You can specify a portion of a clip to be analyzed. For more information, see Define a range of frames for analysis.
Click the Analyze button in the Behaviors Inspector or HUD.
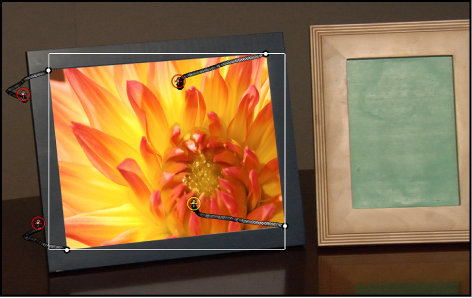
The foreground element is pinned to the background element; four motion paths show the transformation occurring at each corner.
If necessary, make minor adjustments to the foreground element (such as modifying scale or rotation) by doing the following:
Click the Transform pop-up menu in the Behaviors Inspector, then choose Mimic Source.
The default option in the Transform pop-up menu (Attach to Source) does not permit transformations of the foreground element.
Open the Properties Inspector and make any necessary adjustments to the foreground object using the Scale slider, Rotation dial, or other controls.
For more information on the Mimic Source and Attach to Source transform options, see Match Move controls.
If the Match Move corner pinning method described above fails to yield a successful track, try four-point tracking using the Analyze Motion behavior. In this workflow, the four-point tracking data collected from the Analyze Motion behavior is loaded into a Match Move behavior to corner-pin a foreground object.
Go to the frame where you want to start the track and apply an Analyze Motion behavior to the background element.
Important: Whereas the Match Move behavior is always applied to the foreground (destination) layer, the Analyze Motion behavior is always applied to the background (source) layer.
By default, a single tracker appears in the canvas.
Drag the tracker (Track 1) to a reference pattern in the top-left corner of the background element.
Note: For four-point analysis, the trackers should be positioned in a clockwise order, starting in the upper-left corner. This ensures the proper alignment of your element when the transformation is applied.
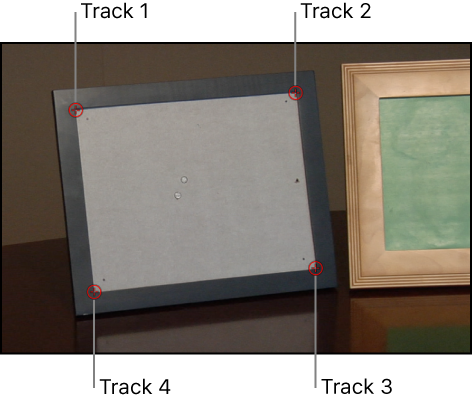
In the Behaviors Inspector, click Add to add a second tracker, then drag the second tracker (Track 2) to a reference pattern in the top-right corner of the background element.
Add another tracker (Track 3), then drag it to a reference pattern in the bottom-right corner of the background element.
Add another tracker (Track 4), then drag it to the reference pattern in the bottom-left corner of the background element.
Note: To modify parameters for any of the trackers, position the pointer over the right side of the track parameter row and click Show.
Click the Analyze button in the Behaviors Inspector or HUD.
The track is generated and its data is saved in the behavior.
Apply a Match Move behavior to the foreground element you want to corner-pin.
In the Match Move area of the Behaviors Inspector, click the Action pop-up menu (with the gear icon), then choose the Analyze Motion track.
Doing so applies the Analyze Motion tracking data recorded in step 6 to the Match Move behavior.
In the Match Move area of the Behaviors Inspector, click the Type pop-up menu, then choose Four Corners.
The four-point tracking data from the Analyze Motion behavior is applied to the foreground object.
Note: In a Match Move behavior with four-point tracking, trackers are placed in the correct order (clockwise from the top left) in the canvas after you choose Four Corner from the Type pop-up menu in the Behaviors Inspector.
When you match move 3D groups that contain objects offset in Z space (depth), parallax is simulated. Parallax is the apparent shift of an object against a distant background caused by a change in perspective, such as a change in camera position. You can disable this effect, if necessary, by doing the following:
Select the Flatten checkbox for the tracked group in the Group Inspector.
The parallax effect is removed.