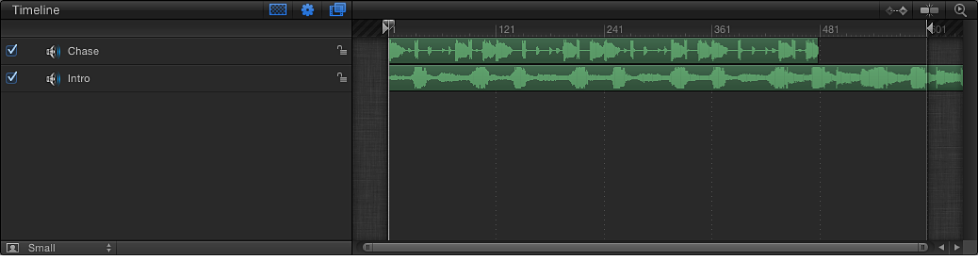
The Audio Timeline provides a view of audio elements over time. The audio tracks appear as green bars with the audio waveform superimposed on the bar, and can be edited like other objects in the Timeline. The Audio Timeline uses the same ruler, buttons, and other controls as the Timeline. For more information on the Timeline interface, see Timeline overview.
When you import an audio file, its start point is placed at the start of the project or at the current playhead position (depending on the setting of the Create Layers At parameter in Motion preferences—see If it’s your first import).
You can adjust audio tracks in the Timeline using standard nonlinear editing techniques:
Slide an audio track in the Audio Timeline or mini-Timeline so the track starts playing at a different point in time.
Slip a trimmed audio track in the Audio Timeline or mini-Timeline so a different range of media plays at the same location.
Trim an audio track in the Audio Timeline or mini-Timeline to reduce track length or to have the media start or end at a specific point in time.
Each of these editing techniques is “nondestructive”—it does not alter the audio source file on your computer or external storage device.
Do one of the following:
Choose Window > Audio Timeline (or press Command-9).
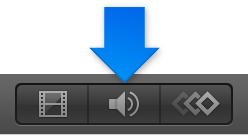
Click the Show/Hide Audio Timeline button in the lower-right corner of the Motion workspace.
Slide an audio track to change its position in the Timeline.
Do one of the following:
In the Audio Timeline, drag an audio track’s green bar left or right.
Select an audio track in the Audio list, then in the mini-Timeline, drag the track’s green bar to the left or right.
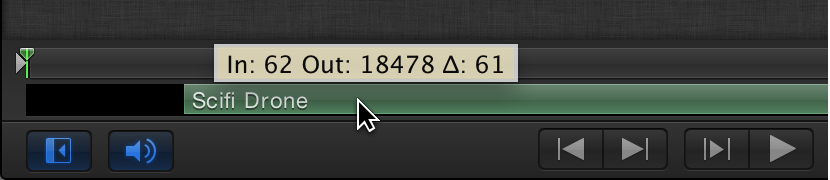
Slip an audio track to change the range of playable media. When you slip an audio track, its In and Out points remain unchanged in the Timeline, but the playable portion of the audio file changes.
Do one of the following:
In the Audio Timeline, holding down the Option key, drag left or right to slip the portion of the audio file.
As you drag, the pointer becomes a slip pointer, a dimmed bar representing the full range of the audio clip appears over the green bar, and a tooltip appears, showing the In and Out points of the audio clip.
In the Audio list, select a track, then, holding down the Option key, drag left or right over the green bar in the mini-Timeline.
As you drag, the pointer becomes a slip pointer, a dimmed bar representing the full range of the audio clip appears over the green bar, and a tooltip appears, showing the In and Out points of the audio clip.

Note: You can only slip media that has had its In or Out points trimmed, leaving unused audio available on either side or both sides of the green bar.
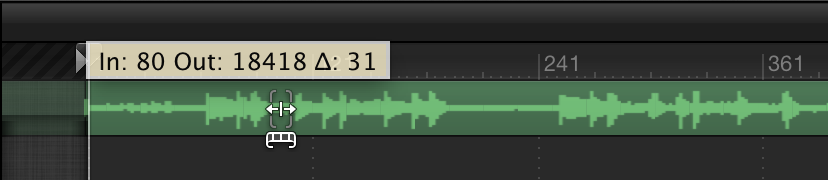
Trim an audio track to reduce track length or to have it start or end at a specific point in time.
In the Audio Timeline, place the pointer over the beginning or end of a green bar until the trim pointer appears, then drag left or right.
As you drag, a tooltip shows you the new In or Out point and the duration of the modified track.
In the Audio list, select a track, place the pointer over the beginning or end of the green bar in the mini-Timeline until the trim pointer appears, then drag left or right.
As you drag, a tooltip shows you the new In or Out point and the duration of the modified track.
In the Audio list, select an audio track.
Open the Properties Inspector and show the Timing parameters.
Modify the In, Out, or Duration value sliders
As you adjust the value sliders, the green bars in the Audio Timeline and mini-Timeline are updated.
In the Audio list, select an audio track, then do one of the following:
In the Audio list, select an audio track, then do one of the following:
Change the track’s start point: Move the playhead to the frame you want, then choose Mark > Move Selected In Point.
Change the track’s end point: Move the playhead to the frame you want, then choose Mark > Move Selected Out Point.