Presets Pane
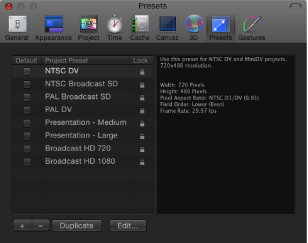
The Presets pane of Motion Preferences contains presets for project settings. In this pane, you can choose defaults, as well as create, modify, and delete settings. The default project preset determines the settings assigned when you create a project. You can change any of these settings while you are working by selecting the Project object in the Layers list, then clicking Properties in the Inspector.
After a default project is set in this pane, all new projects opened from the Project Browser are created with this setting (unless you choose another option from the Preset pop-up menu in the Project Browser).
Project Preset Editor
The Project Preset Editor is where you make changes to a project preset.
Note: Locked presets cannot be edited. If you attempt to edit a locked preset, an alert dialog appears, a duplicate copy of the preset is made, and your edits are applied to the duplicate.
In the Presets pane of Motion Preferences, do one of the following:
Double-click a preset in the Preset list.
Select a preset in the Preset list and click the Edit button.
Note: If the preset cannot be modified, an alert dialog appears. Click OK to create an editable copy of the preset.
Select an item in the Preset list, click Duplicate, select the copied preset, then click the Edit button.
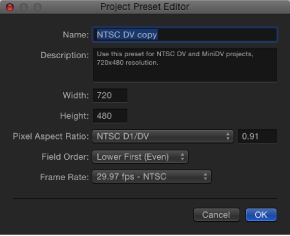
The Project Preset editor contains the following settings:
- Description: This field contains descriptive text to identify the preset. You can enter your own descriptive text in this field. The new text will appear in the Summary box in the Preset pane of Motion Preferences.
Note: In the lower-right corner of the Project Browser, only the resolution, field order, and aspect ratio appear—the descriptive text (or preset name) does not appear.