Modifying Curves
The Keyframe Editor lets you make changes to the curves between keyframes. This might be the Keyframe Editor’s most valuable feature. Although you can manually create nearly any curve shape to create the animation you want, Motion also provides tools to control the automatic interpolation and extrapolation of parameter values.
To set the interpolation for a curve, you select the keyframe you want to modify. The method you choose determines the distribution of values through, into, or out of the selected keyframe. By using different preset mathematical algorithms, you can dramatically alter the impact of your effects.
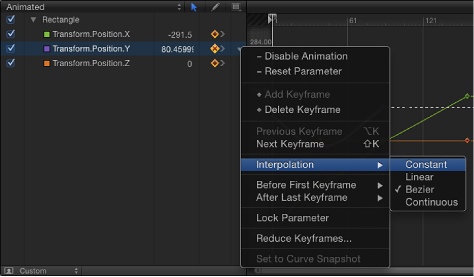
Control-click a keyframe, choose Interpolation from the shortcut menu, then choose a method from the submenu.
Select multiple keyframes, Control-click one of them, choose Interpolation from the shortcut menu, then choose a method from the submenu.
The interpolation method chosen is applied to the entire selection.
Control-click a segment between two keyframes, choose Interpolation from the shortcut menu, then choose a method from the submenu.
Only the segment between the surrounding two keyframes is affected by the interpolation method you choose. You can set different interpolation methods for other segments of the same curve.

When different interpolation methods are applied to segments of an animation curve, the methods used in the curve appear with a dash next to their name in the Interpolation submenu (in the Keyframe Editor parameter list).
Interpolation methods include the following:
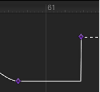
- Constant: This method holds the keyframe at its current value when applied to a segment or keyframe and then abruptly changes to the new value at the next keyframe.
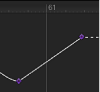
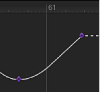
- Linear: When applied to a keyframe, this method creates a uniform distribution of values through the keyframe from its two adjacent keyframes. When applied to a segment, this method creates uniform distribution of values between points.
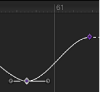
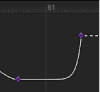
- Bezier: This method lets you manipulate the keyframe curve manually by dragging the handles. If multiple Bezier keyframes are selected, or Bezier interpolation is applied to the curve segment, the handles of all selected keyframes are modified.
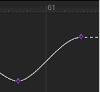
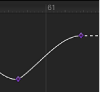
- Continuous: This method behaves like Bezier interpolation, but without access to the handles (which are calculated automatically). The parameter begins to change gradually, reaching its maximum rate of acceleration at the midpoint, then tapers off slightly as it approaches the second keyframe. When applied to a keyframe, the segments before and after the keyframe are affected. When applied to a curve segment, the segment between the keyframes is affected.
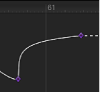
- Exponential: This method creates an exponential curve between the current keyframe and the next, changing the value slowly at first, then reaching its maximum rate of acceleration as it approaches the next keyframe.
- Logarithmic: This method creates a logarithmic curve between the current keyframe and the next, changing the value rapidly at first, then slowing drastically as it approaches the next keyframe.
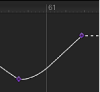
- Ease In: This method has a reverse-inertia effect, so a value change slows coming into a keyframe. When applied to a curve segment, the value change eases into the segment. This option is available only when you Control-click a keyframe; it is not available in the Animation pop-up menu.
- Ease Out: This method creates a typical inertia-like lag, so a value change begins more slowly coming out of a keyframe. When applied to a curve segment, the value change eases out of the segment. This option is available only when you Control-click a keyframe; it is not available in the Animation pop-up menu.
- Ease Both: This method combines Ease In with Ease Out, applying both at once. This option is available only when you Control-click a keyframe; it is not available in the Animation pop-up menu.
Alternatively, you can apply an interpolation method to the entire parameter.
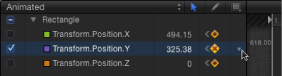
Click in the fifth column of the Keyframe Editor parameter list to open the Animation menu, then choose a method from the Interpolation submenu.
The selected interpolation method is applied to that parameter’s curve.
In the parameter list of the Keyframe Editor, Shift-click to select multiple parameters.
Click in the fifth column of the Keyframe Editor parameter list to open the Animation menu, then choose a method from the Interpolation submenu.
The selected interpolation method is applied to all selected curves.
Convert to Bezier
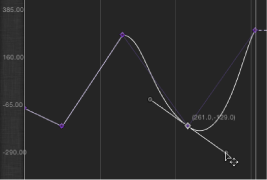
Bezier interpolation is the most flexible, allowing manual modification of the curve. Motion lets you convert any keyframe into a Bezier keyframe.
While holding down the Command key, drag the keyframe in the keyframe graph.
Bezier handles appear and your mouse movement controls one of the handles.
Note: Command-clicking a Bezier point resets it to Linear interpolation.
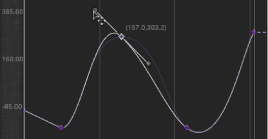
To simultaneously modify the handles for more than one control point, Shift-click to select multiple points, then adjust the tangents. If there are no tangents on the point, drag it while holding down the Command key.
Hold down the Option key and drag a tangent to adjust it independently of the other.
Hold down the Option key while dragging the handle of a control point with broken handles to lock them together again.
Control-click a tangent’s handle, then choose Link tangent to constrain one broken tangent to another so both move together.
Control-click a tangent’s handle, thenchoose Align Tangents to line both tangents up again.
While holding down the Shift key, drag the handle.
Extrapolation
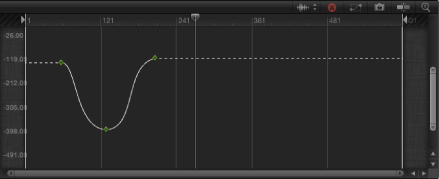
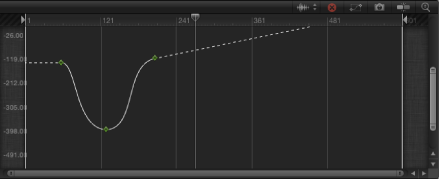
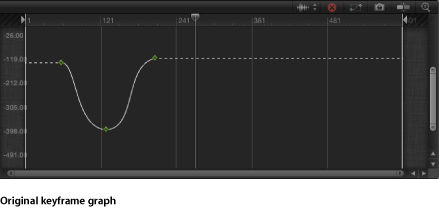
In addition to setting interpolation for areas between keyframes, you can define how Motion generates the values before the first keyframe and after the last one. This is known as extrapolation. When you set a such a method for a parameter, keyframes are added beyond your original keyframes, which is useful to extend the duration of an effect such as a moving background. Several extrapolation methods are available Before First Keyframe and After First Keyframe submenus in the Animation menu: Constant, Linear, Ping-Pong, Repeat, and Progressive.
Click in the fifth column of the parameter list in the Keyframe Editor to open the Animation menu for the parameter to change, then choose an item from the Before First Keyframe submenu.
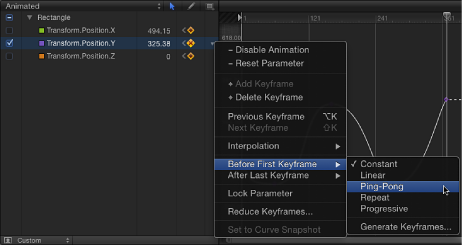
Click in the fifth column of the parameter list in the Keyframe Editor to open the Animation shortcut menu for the parameter to change, then choose an item from After Last Keyframe submenu.
The following extrapolation options are available in the Before First Keyframe and After Last Keyframe submenus:
- Constant: This method, the default, holds the beginning or ending segments of the curve to the same value as the first or last keyframe.
- Linear: This method extends the curve beyond the first or last keyframes uniformly, along the existing trajectory of the first or last keyframe.
- Ping Pong: This method copies the curve and repeats it, alternating forward and backward.
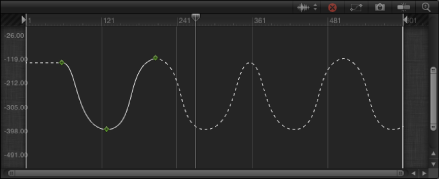
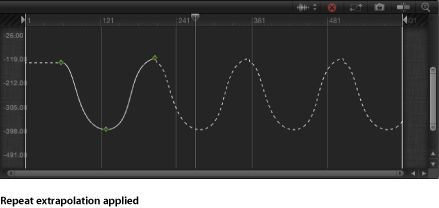
- Repeat: This method duplicates the curve, applying it again and again.

- Progressive: This method extends the curve by repeating the existing shape of the curve, but rather than returning to the exact values, repeats from the existing end value.

Generate Keyframes Command
Ordinarily, keyframe extrapolation occurs without creating keyframes. This lets you experiment with various methods. However, you can convert an extrapolation method into keyframes to further manipulate them. This is done using the Generate Keyframes command. You can choose how many extrapolation cycles you want converted into keyframes. Cycles after the number chosen remain in the extrapolated state.
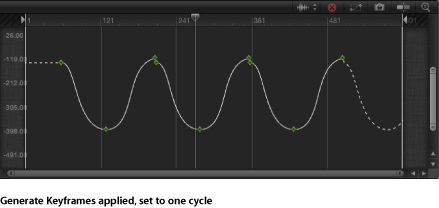
In the Keyframe Editor’s Animation menu, choose Generate Keyframes from the Before First Keyframe or After Last Keyframe submenu.
The Generate Keyframes dialog appears.
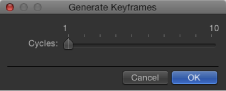
Choose the number of cycles to be keyframed.
Click OK to confirm your selection.