Beat Mapping Audio Regions
Beat mapping audio regions works in a similar fashion as it does for MIDI regions. The main difference is that Logic Pro must first analyze audio regions in order to find rhythmically prominent spots, which can subsequently be linked to a bar position. Logic Pro searches for transients when analyzing audio regions. Transients are positions where the audio recording becomes a lot louder—over a very short time span (a signal spike, in other words). This is typical of drum recordings, but the analysis of other instruments or complete mixes (depending on the musical context), can also produce usable results.
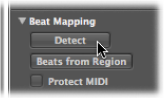
Select the regions that you want to analyze, and click the Detect button in the track header of the Beat Mapping track.
Drag the regions onto the Beat Mapping track.
Following analysis, the transients are displayed as small vertical lines at the bottom of the Beat Mapping track.
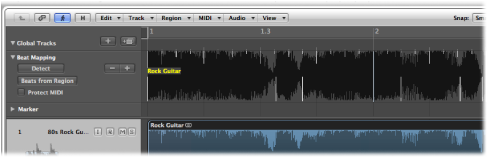
Tip: It can sometimes be difficult to identify transients, due to the waveform overview being too small. In this situation, you should use the Waveform Zoom button, found to the left of the horizontal zoom control in the Arrange area. This allows you to visually resize the waveform in the Beat Mapping track.
The remaining steps of the beat mapping procedure are as described for MIDI regions. For details, see Beat Mapping MIDI Regions.
There are a number of ways to improve the beat mapping accuracy of audio regions. When you click the Detect button in the Beat Mapping track, detected transients are displayed above a certain visibility threshold. It is possible to adjust this threshold using the − and + buttons in the Beat Mapping track.
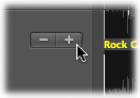
Clicking the − button decreases the number of displayed transients.
Clicking the + button increases the number of displayed transients.
A high number of transients can be useful if dealing with less distinct accents in the music—such as soft drums in a loud mix. On the other hand, such a setting might lead to the display of transients that have no meaning for the rhythmic structure of a region. In general, you should begin with a lower setting, and only switch to a higher setting if obvious rhythmic elements in the music aren’t recognized correctly.
On occasion, your recordings may contain (MIDI note) events that fall onto musically useful positions, and should remain there when beat mapping is used for audio recordings. Such situations are catered for by the inclusion of the Protect MIDI option, found in the track header of the Beat Mapping track. Simply activate this option to keep existing MIDI events at their current Bar ruler positions when beat mapping.
You can also make beat mapping easier by moving one or multiple selected audio regions, so that the first transient marker in any of the regions is located on the nearest whole beat position.
Control-click (or right-click) the beat mapping header, and choose Move Selection with First Transient to Nearest Beat from the shortcut menu (or use the corresponding key command).
This moves the first transient marker in the region selection to the nearest whole beat position, with all selected regions moving with it.