Using the Sample Editor’s Groove Machine
You can use the Groove Machine to alter the feel, swing, or groove of digital audio material, in percentage steps. In other words, this tool can quantize straight audio!
You can also strictly quantize audio that “grooves a little too much” with the Quantize Engine (see Using the Sample Editor’s Quantize Engine).
Opening the Sample Editor’s Groove Machine
You need to select an area within an audio file before you can open the Groove Machine.
Important: Before you open the Groove Machine you should ensure that the tempo of Logic Pro exactly matches that of the selected audio material, or the Groove Machine won’t work accurately. You can, however, set the tempo and length directly in the Groove Machine, using the “Corresponds with Tempo” and To Bar Length parameters.
Select the area of the audio region in the Sample Editor that you want to process through the Groove Machine.
Choose Factory > Groove Machine (or use the corresponding key command).

Note: Any changes you make to the settings will be reflected in the graphical display.
Setting Groove Machine Parameters
Here are the parameters in the Groove Machine:
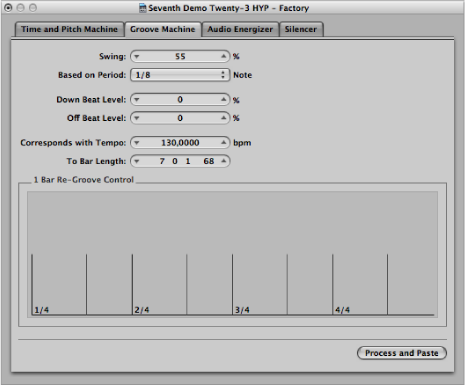
- Down Beat Level and Off Beat Level: Determine whether the down beats, or off beats, in the audio material should be raised or lowered. Positive values increase the level, and negative values reduce the level. Bear in mind that raising the level of normalized audio material can cause distortions—particularly on the down beats, which are usually louder.