Enabling Software Monitoring for Recording
The Software Monitoring function allows you to monitor incoming audio through any effect plug-ins that are inserted into an armed audio channel strip. Audio inputs must be assigned on the record-enabled channel strips for software monitoring to function.
It is important to note that the effect plug-ins are monitored but not recorded, which can be useful during a recording session. For example, during vocal recording many singers prefer to hear their performance with a little reverb, but the track is recorded dry—without effects.
Open Audio preferences by doing one of the following:
Choose Logic Pro > Preferences > Audio (or use the Open Audio Preferences key command.
Click the Preferences button in the Arrange toolbar, and choose Audio from the pop-up menu.
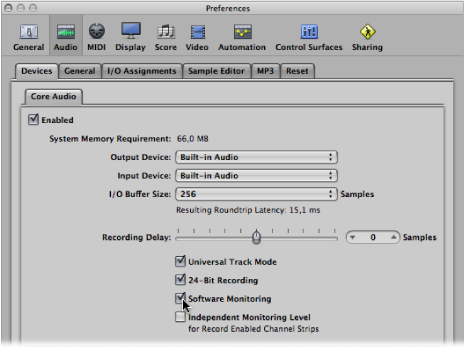
Click the Devices tab and then the Core Audio tab.
Select the Software Monitoring option.
Insert the desired effect plug-in into the audio channel strip, and start recording.
The effect will be part of the monitor mix, but it will not be recorded.
Using Auto Input Monitoring for Recording
If Auto Input Monitoring is turned on, you will hear the input signal only during the actual recording—before and afterwards you’ll hear the previously recorded audio on the track, while Logic Pro is running. This helps you to judge punch-in and punch-out points when you are punch recording. If Auto Input Monitoring is turned off, you will always hear the input signal.
Choose Options > Audio > Auto Input Monitoring from the main menu bar (or use the Toggle Auto Input Monitoring key command).
Control-click (or right-click) the Record button in the Transport bar, and choose the Auto Input Monitoring setting from the pop-up menu.
Your individual recording situations will determine whether or not to use auto input monitoring. Consider the following examples:
Singers cannot hear themselves while Logic Pro is in playback mode—all they can hear is the old recording. In this case, turn off Auto Input Monitoring.
The recording cannot be heard in playback mode. In this case, turn on Auto Input Monitoring to hear audio on the track.
Using the Input Monitoring Buttons Before Recording
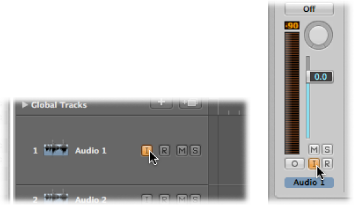
You can use the Input Monitoring buttons to monitor audio tracks that are not armed. This is useful for setting audio levels or practicing parts before you commit to recording.
Simply enable the Input Monitoring button on an audio track—or a channel strip in the Inspector or Mixer. This works when Logic Pro is stopped or playing.
Tip: You can leave the Input Monitoring button turned on before, after, and during recording. When the Input Monitoring button is turned on, the Record Enable button and the Auto Input Monitoring feature do not affect software monitoring—that is, you can always hear incoming audio. When you are punch recording, however, you should use the Auto Input Monitoring feature rather than the Input Monitoring buttons.
Avoiding Latency Issues with Input Monitoring
Note that input monitoring always involves some latency. Latency is entirely dependent on the audio hardware’s capabilities and the driver settings. In certain configurations, it may be best to not monitor through Logic Pro at all, and thus obtain the best possible timing. Route the signal you want to record directly to headphones or the monitoring amplifier for monitoring purposes—and to the audio interface inputs, for recording. You won’t accidentally overdrive your A/D converters, because the input level meters of Logic Pro display a clip warning if an overload occurs.