Using the Library to Choose Plug-in Settings
An alternative to using the Settings menu (found in the plug-in window header) is the Library tab of the Media area.
Click the Media button, then click the Library tab.
Select the arrange track that is routed to the channel strip whose settings you want to adjust.
Click the Insert or Instrument slot of the desired plug-in on the Arrange channel strip.
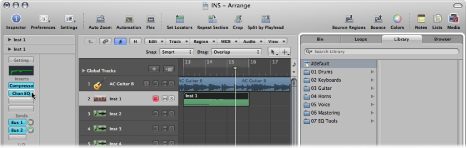
The Library displays all settings available for the chosen plug-in type, sorted into category menus. Examples for the Compressor plug-in include Drum Compressors, Instrument Compressors, and Vocal Compressors.
Click the appropriate category menu, then click a setting name to change the setting for the selected plug-in.
Note: You can click the Revert button in the Library tab to return to the previous plug-in setting.
Clicking further Insert or Instrument slots, if used, updates the Library tab to show all settings for the chosen plug-in type.
If you click an unused Insert or Instrument slot, the Plug-in menu is shown, as usual. Choose a plug-in and the Library tab updates to reflect your selection.