Setting Project Properties
Following the creation of a project, a number of project properties should be checked, and changed if necessary. This is a great working practice as it will limit any morning-after corrections that will need to be made later, such as sample rate conversions on a hundred or more audio files. This section outlines the project properties that you should take into consideration before beginning any work.
Setting the Sample Rate
The project’s sample rate determines the number of samples Logic Pro uses for audio playback. When you add or record audio files to your project, the sample rate of these files is automatically matched to the project sample rate.
Important: The “Convert audio file sample rate when importing” project setting must be active for automatic sample rate matching. You can turn on this setting in the File > Projects Settings > Assets pane.
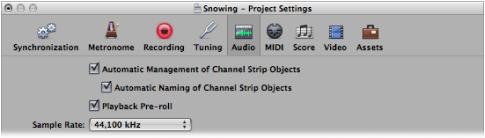
Choose File > Project Settings > Audio (or use the Open Audio Project Settings key command), then choose the a sample rate from the Sample Rate menu.
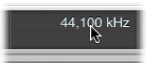
Click the Sample Rate display in the Transport bar, then choose a sample rate from the pop-up menu.
Note: If your Transport bar does not include the Sample Rate display, Control-click it and choose Customize Transport Bar from the shortcut menu. Select the Sample Rate or Punch Locators checkbox in the Customize Transport Bar dialog.
You may find that audio files in your project do not match the newly selected sample rate. The playback of files that do not match the project’s sample rate is slower (file’s sample rate is higher) or faster (file’s sample rate is lower) than it should be.
Use the Audio Bin’s Copy/Convert File(s) command (which is also available by Control-clicking the Audio Bin or using the corresponding key command), then replace the file in the project.
Logic Pro performs a real-time, native sample rate conversion. Any sample rate available in Logic Pro (via Audio > Sample Rate) can be used for the conversion—even if your audio hardware does not support the selected sample rate.
The native software sample rate conversion function matches the sample rate of any audio hardware, thereby allowing the playback of projects on virtually any audio system, even if the hardware is—in sample rate terms—not compatible. Nothing is lost in the process. Any internal processing and bouncing is always performed at the original sample rate, and at the highest quality, even in cases where the hardware does not support a particular sample rate. This feature allows you to work on projects originally created on high-end audio systems, with lower-end setups.
For example, imagine a project was created with audio hardware set to operate at 96 kHz. Moving this project to a notebook computer, or setup that does not support the original project’s sample rate, will commonly result in the wrong playback speed. The native real-time sample rate conversion function will counteract this effect, allowing correct playback of the project on the portable computer, at any sample rate.
Note: High sample rates not only use up disk drive space, but also result in a higher processing load.
Setting the Project Tempo
You can set the basic project tempo in the Transport bar, the Tempo track, or the Tempo List. Logic Pro displays tempo as quarter notes per minute, or beats per minute (bpm). It ranges from 5 to 990 bpm, and is adjustable to four decimal places after the whole value.
In the Transport bar, do one of the following:
Click-hold the tempo value, and drag up or down.
Double-click the tempo value, and type a new value in the text field.

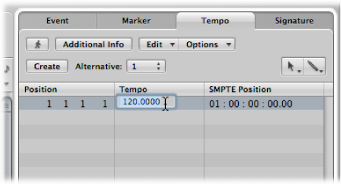
In the Tempo List, do one of the following:
Click-hold the tempo value, and drag up or down.
Double-click the tempo value, and type a new value in the text field.
Open the Tempo track, and drag the tempo line up or down with the Pointer tool.

For more information about advanced tempo operations, see Advanced Tempo Operations.
Setting the Project Time Signature
The time signature defines how many beats a bar contains in the Bar ruler and what note value constitutes one beat.
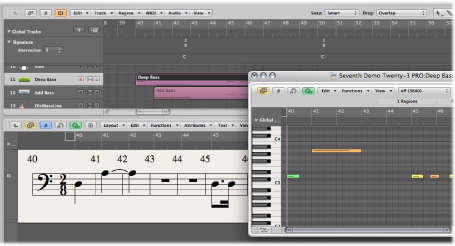
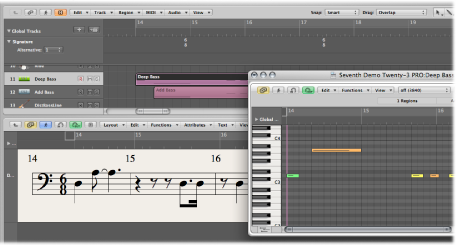
Time signatures do not affect the playback of your project, but determine the editing grid in the Arrange area and MIDI editors as you can see in the following images. Both show the same MIDI region, with the first at a time signature of 2/8, and the second at 6/8.
You can set the time signature of the project in the Transport bar, the Signature List, or the Signature track. The Transport bar displays the time signature in the following format: numerator : bar denominator : division value.
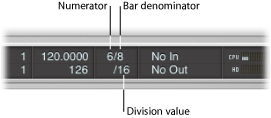
The division value defines the division in all position displays (such as in the event editors), and forms the grid for various length and placement operations. The division value is normally set to 1/16 notes, but has a value range of 1/4 to 1/192 note. If the note value of the division is equal to or greater than the bar denominator, the third value of the position display is automatically removed.
Tip: You can use the Set Next Higher/Lower Division key command to switch to the next highest or lowest division.
The tempo indicator in the Transport window always relates to quarter notes, even if eighth notes are chosen as the denominator for the time signature.
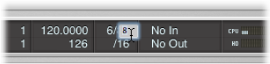
In the Transport bar:
Click-hold either of the time signature values, and drag up or down.
Double-click the numbers in the field, and type a new value in the text field.
In the Signature List:
Click-hold the time signature value, and drag up or down.
Double-click the time signature value, and type a new value in the text field.
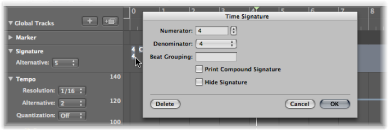
Open the Signature track, and double-click the value shown. Set the Numerator and Denominator values (and other settings, if desired).
For more information on time signatures, refer to Working with Time and Key Signatures.
Setting the Start and End Points of a Project
A project normally starts at position 1 1 1 1. You can move the project start point to an earlier position, allowing upbeats or program change commands to be played before the first downbeat.
Drag the project start marker in the Bar ruler to the left or right.
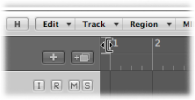
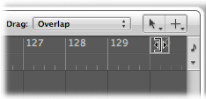
Drag the project end marker in the Bar ruler to the left or right.
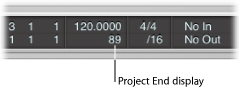
Set the value in the Transport bar’s numerical Project End display (by click-dragging or double-clicking the value).
Note: If your Transport bar does not include the Project End display, Control-click it and choose Customize Transport Bar in the shortcut menu. Select the Tempo/Project End checkbox in the Customize Transport Bar pane.
As soon as Logic Pro reaches the project end point, it stops automatically, except when recording. In this situation, the project end point is automatically moved to the end of the recording.
Setting the Basic Project Playback Volume
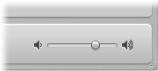
You use the Master Volume slider at the right of the Transport bar to set the basic project playback volume. This slider is directly tied to the Master channel strip in the Mixer, and acts as a master volume control for all audio and software instrument tracks.
Important: This slider not only sets the playback volume of your project, but also affects the overall volume of your mix.
Drag the Master Volume slider.
Drag the Volume fader in the Master channel strip.
Click the Reset Master Volume button to the right of the Master Volume slider.
Option-click the Master Volume slider.
Option-click the Volume fader in the Master channel strip.
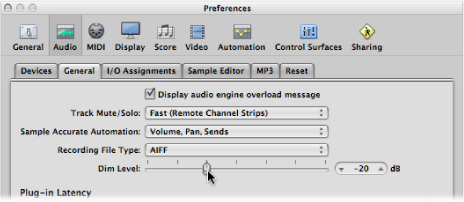
Click the Dim Master Volume button to the left of the Master Volume slider.
Click the Dim button in the Master channel strip.
This reduces the playback volume to the dim level set in the Logic Pro > Preferences > Audio > General pane.
Adjusting Project Settings
The project settings encompass a number of options that can have a dramatic impact on the behavior of Logic Pro. Project settings are saved independently with each project, which means that different projects can have different project settings. You can change project settings at any time, but it is generally best if you start off with the required settings, as this will make your workflow smoother.
Choose an item from the File > Project > Settings (Synchronization, MIDI, Score, and so on) menu (or use the corresponding key command).
Click the Settings button in the Arrange toolbar, then choose a menu item.
Detailed information on all project settings can be found in Project Settings in Logic Pro.
Handling Project Assets
The project settings also include an Assets pane. If you saved your project with its assets, you can use this pane to determine how files imported from external locations (locations outside the project folder) should be handled.
Choose File > Project Settings > Assets (or use the Open Assets Project Settings key command).
Click the Settings button in the Arrange toolbar, then choose Assets from the pop-up menu.
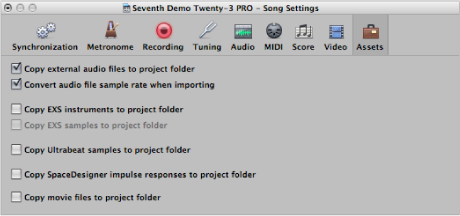
Select any of the copy checkboxes to copy the respective file types into the project folder.
Select the “Convert audio file sample rate when importing” checkbox to automatically convert the sample rate of all imported files (with a different sample rate) to match the project sample rate.
If you deselect the “Copy EXS samples to project folder” option, only EXS instrument files are copied to the project folder when saving, not the samples associated with the EXS instrument files.
Files are only copied into the project folder when the project is saved.
Once saved, the project is “safe,” allowing you to move or copy the entire project folder without losing any references that point to files within the folder.