Saving Projects
When you choose File > Save (or use the corresponding key command, default assignment: Command-S), the current project is saved with its current name intact.
If you don’t want to overwrite the most recent version of the project file saved with this name (which will happen if you use File > Save or Command-S), make use of the File > Save As or File > Save a Copy As commands. In the dialog that appears, you can enter a new name for the project, set assets, and select a new directory or even create a new folder.
- File > Save As: The next time you save using the straight Save (Command-S) command, the new filename and path are used. If you use this command to save your project to a new location (outside the current project folder) and select the Include Assets checkbox, the new project folder will contain all audio files used in the “old” project’s Arrange area.
- File > Save a Copy As: The next time you save with the straight Save (Command-S) command, the existing filename and path continue to be used. The copy is a replica of the existing project, stored in a different location. It does not update the file save path. Save a Copy As is ideal for archiving and moving data.
Automatic Backup Files
When you save a project, Logic Pro automatically saves up to one hundred backup copies in the project folder’s Project File Backups folder. The backup files are named after the project file, with the number (00, 01, 02, and so on) appended to the project name.
You can define the number of project backups you want to keep by changing the Auto Backup setting in the Logic Pro > Preferences > General > Project Handling pane.
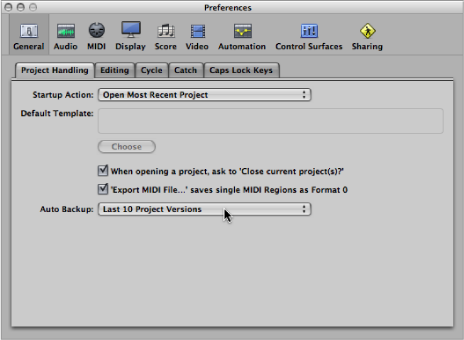
Your choices are:
Off
Last Project Version
Last 3 Project Versions
Last 5 Project Versions
Last 10 Project Versions
Last 30 Project Versions
Last 50 Project Versions
Last 100 Project Versions
Reverting to the Saved Version
Any time you make a mistake, you can undo it by choosing Edit > Undo (or use the corresponding key command, default assignment: Command-Z).
If you have made some really serious blunders (as unlikely as that may be), or you decide that in the 15 minutes since you last saved, your creative efforts have resulted in material too unpleasant to describe politely, you may find the File > Revert to Saved function (or the corresponding key command) very helpful. This replaces the current project with the previously saved version.
Saving a Project as a Template
You can save a project as a template, creating starting points for new projects. Not all projects have the same needs, so customizing several projects to meet these needs offers an ideal starting point for different jobs. For example:
A template that is software instrument–focussed, for dance music projects. This would feature 32 software instrument tracks, and maybe 8 audio tracks.
An audio track–centric template, featuring 64 audio tracks, would be ideal for live recording.
A specific live performance template that makes the job of quickly switching between parts faster, or perhaps makes heavy use of Environment processing.
Several scoring templates for choirs, a rock band, symphony orchestra, string quartet, jazz combo, and so on.
A template containing modified synchronization settings for control of ADAT hardware.
A template for video work. This would typically contain a video track plus specific dialogue, Foley, and music tracks.
A second video template could be used for jobs where the video is running on an external videotape machine that is synchronized with Logic Pro via SMPTE.
Screensets can be customized for each template, or you can make use of the various Import Settings commands to copy them between templates. For details, see Importing Settings from Another Project.
Choose File > Save as Template (or use the corresponding key command), then type in a name.
The project is saved in the ~/Library/Application Support/Logic/Project Templates folder. The next time you open the Templates dialog, you will see your template in the My Templates collection, below the factory template collections.
You can create collections under My Templates by creating sub-folders in the ~/Library/Application Support/Logic/Project Templates folder. This can be done in the Finder, or with the Create Folder button in the Save As Template dialog. When all user templates are placed in sub-folders, the sub-folder names are shown below the factory collections.
Tip: You can add descriptive text to your templates by adding a comment to the project file in the Finder. The Templates dialog displays the icon assigned to a template file, making it easy for you to change a template’s icon. For more information on how to add a comment to a file, or change the icon of a file, see Mac Help.