Editing Markers
Markers can be edited in various ways. Common tasks include changing marker positions, coloring markers, and adjusting marker lengths.
In the Marker track: Drag it to the left or right.
In the Bar ruler: Command-drag the marker to the left or right.
In the Marker List: Use the mouse as a slider on the bar Position display, or double-click a position value and enter the new value with the computer keyboard.
Note: The smallest movements that can be achieved in the Marker track and Bar ruler depend on the division setting in Transport area, the Snap menu setting, and the horizontal zoom level (including sample-accurate placement at the highest zoom levels). Watch the help tag for precise feedback on movements. The alternative for fine position adjustments is the Marker List.
There are times when you will want to protect markers from being moved. Logic Pro has a feature that preserves the absolute time position of events.
Choose Options > Lock SMPTE Position in the Marker List (or use the corresponding key command).
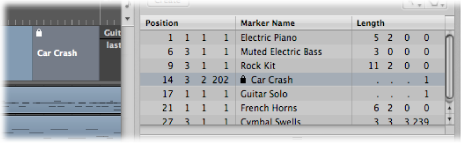
This locks (fixes) the SMPTE position of markers. To indicate this status, a lock symbol is displayed at the beginning of the marker name.
These markers always retain their absolute time position: if the project tempo is changed, the bar positions will change to keep the markers at the same SMPTE positions.
Tip: You can also lock/unlock the SMPTE positions of markers from the Arrange area’s Region menu, and the Functions menu of the Piano Roll Editor and Hyper Editor, if you enable the display of global tracks.
Choose Options > Unlock SMPTE Position in the Marker List (or use the corresponding key command).
Note: You cannot unlock the SMPTE position of scene markers. See Working with Movie Scene Markers.
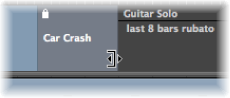
In the Marker track: Place the pointer over the marker border. When the pointer changes to a Resize pointer, drag the marker border to the new position.
In the Marker List: Use the mouse as a slider on the bar Position display, or double-click a position value and enter the new value with the computer keyboard.
The marker border can also be the beginning of the subsequent marker, especially if the length of the second marker hasn’t been defined. Markers cannot overlap.
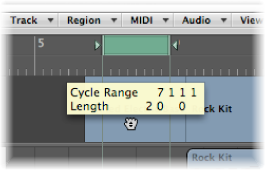
Drag a cycle onto an existing marker (with a right or left border—or both—that falls inside the cycle boundaries).
Dragging the cycle area in the Bar ruler is limited to either horizontal or vertical movements. This ensures that you do not accidentally:
Move the cycle when creating markers (by dragging the cycle into the lower third of the Bar ruler or into the Marker track).
Create markers when moving the cycle.
Tip: When you hold Shift, after click-holding the cycle, the cycle can be moved horizontally, and then dragged onto a marker in one go. When you hold Shift, before clicking the cycle, the nearest cycle border is set to the clicked position.
Select a marker in the Marker track, choose View > Colors, then click a color in the palette.
If dark colors are used, the marker text is automatically shown in an inverse color. If you create markers from regions, the corresponding marker uses the region color.