Zooming the Working Area
The zoom controls are used to zoom in and out on the working display area. The zoom value you choose reduces or increases the size of events or regions in the displayed screen section. This allows you to:
See more events or regions in the same amount of screen space (zoom out)
See a detailed display of events or regions (zoom in)
While zooming, the top-left (and selected) event or region is kept in the visible area of the screen. In other words, the first selected region or event is retained in the zoomed window. If no selected region or event is visible, zooming is centered around the playhead. If the playhead isn’t visible, the current center of the window is retained.
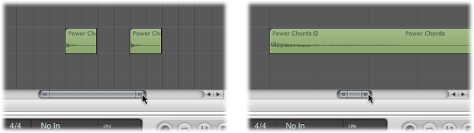
The horizontal and vertical zoom controls are located in the bottom-right corner of the working area of the window.

Click the more closely spaced bars to decrease the zoom level.
Click the widely spaced bars to increase the zoom level.
You can drag the zoom sliders to step through several zoom levels. Any relative size differences between tracks are retained when zooming.
Zooming with the Playhead
The playhead can be used to zoom in and out on the working display area.
Click-hold in the lower section of the Bar ruler.
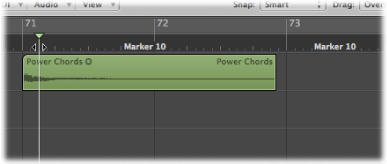
Drag the top of the playhead up or down.
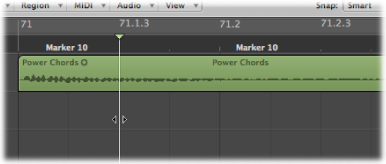
Zooming with the Scroll Bars
The scroll bars not only allow you to move through your arrangement and editing windows; they can also be used for zooming.
Click-hold the zoom handles at either end of the scroll bar, and drag:
Up or down on the vertical scroll bar
Left or right on the horizontal scroll bar
As you drag, the window contents zoom.
Zooming with the Trackpad
The trackpad can be used to zoom in and out on the working display area.
Pinch open on the trackpad using two fingers.
Pinch close on the trackpad using two fingers.
Zooming with the Waveform Zoom Button
Next to the Arrange area’s horizontal zoom control, you can find the Waveform Zoom button. This button can be used to visually resize the waveform of all audio regions and the waveform in the Beat Mapping track, if Beat Mapping is enabled in global tracks.
Click the Waveform Zoom button (or use the Toggle Waveform Vertical Zoom key command).
When this button is activated, the waveform shown in all audio regions, and in the Beat Mapping track, zooms to the assigned zoom level. You can change the zoom level to suit your needs.
Click-hold the Waveform Zoom button. A slider appears.
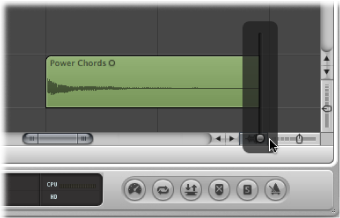
Drag the slider. As you do, the waveform shown in all audio regions, and in the Beat Mapping track, is increased or decreased in size.
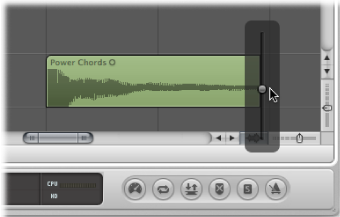
Note: This is a purely visual function. The amplitude (level) of the waveform is not affected.
You can also change the zoom level using the following key commands:
Waveform Vertical Zoom In
Waveform Vertical Zoom Out
Waveform Vertical Zoom x 1 (Normal)
Waveform Vertical Zoom x 2
Waveform Vertical Zoom x 4
Waveform Vertical Zoom x 8
Zooming In on One Section of the Screen
To enlarge a section of the screen to fill the whole window, drag to select the area with the Zoom tool.
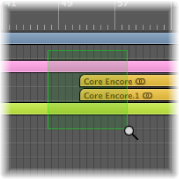
You can do this repeatedly, if you need to zoom in further.
Tip: You can access the Zoom tool when other tools are selected by holding down the Control and Option keys.
Storing and Recalling Zoom Settings
You can store three different zoom settings for each window using the Save as Zoom 1–3 key commands. Use the Recall Zoom 1–3 key commands to recall your zoomed settings. These commands only apply to the active window or window area.
Reverting to the Previous Zoom Setting
Click the background with the Zoom tool. This action returns the zoom level to the original setting, or backtracks through previous zoom steps if the tool was used multiple times.
Using Zoom Navigation Key Commands
You can set, and recall, up to 30 zoom level and scroll bar positions for each window. These allow you to navigate through a number of window zoom levels and scroll bar positions, making repetitive editing tasks much faster.
You can use the following commands to zoom selected events, or a region defined by the locators, to fit the screen. The use of all zoom commands creates a new step in the navigation path.
- Zoom to fit Selection vertically and horizontally, store Navigation Snapshot: Displays the current selection as large as possible, and saves it in the navigation path.
Note: When a marquee selection is active, using this key command changes the current zoom level to fit the marquee selection.
- Zoom to fit Selection horizontally, store Navigation Snapshot: Displays the current selection as large as possible horizontally, and saves it in the navigation path.
Note: When a marquee selection is active, using this key command changes the current zoom level to fit the marquee selection.
- Zoom to fit Selection vertically, store Navigation Snapshot: Displays the current selection as large as possible vertically, and saves it in the navigation path.
- Zoom to fit Locators, store Navigation Snapshot: Displays the current locator area as large as possible, and saves it in the navigation path.
- Zoom to fit All Contents, store Navigation Snapshot: Adjusts the zoom level in order to fit the entire contents of the focused window into the current view.
The navigate key commands allow you to recall the previous or next zoom settings.
- Store Navigation Snapshot: The current zoom and scroll bar (window position) settings are saved as a step in the navigation path.
- Navigation: Back: Recalls the previous step in the navigation path.
- Navigation: Forward: Advances to the next step in the navigation path.
As an example of where the navigation path commands could be useful: Imagine cutting and pasting sections of an audio region to several other locations, in a project with hundreds of tracks. One step in your navigation path would be a zoomed view of the audio region. Another step could be a vertically zoomed-in version of several tracks (the target tracks for the pasted region sections). A further step could be a horizontally zoomed-out section of the project, allowing you to paste the region segments to a later position.
Note: There are no default key commands for most of these navigation options, so you need to assign them in the Key Commands window. Choose Logic Pro > Preferences > Key Commands and type “nav” in the search field. This will display the entries described above. For more information about assigning key commands, see Assigning Key Commands to Computer Keys.