Handling QuickTime Movie Audio Tracks
Once a movie has been opened in a project, you can make use of the Import Audio from Movie or Export Audio to Movie commands, found in the File menu.
You can adjust the audio level and output device in the Video project settings (see Video Project Settings).
Importing Audio Tracks From QuickTime Movies
You can import audio from QuickTime movies to your project.
Select the required audio tracks.
Do one of the following:
Choose File > Import Audio from Movie from the main menu bar (or use the corresponding key command).
Control-click (or right-click) the global Video track area, and choose Import Audio from Movie from the shortcut menu.
Click OK in the dialog that appears.
The selected audio tracks are bounced to an AIFF file, and placed in the Audio Bin. A new audio track is also created at the top of the Arrange area, and the imported audio from the movie is added to this track. The movie name is retained and used for the resulting audio files.
Exporting Audio Tracks to QuickTime Movies
You can export audio from the part of your project that is encompassed by the QuickTime movie to the movie file itself, effectively overwriting the original movie soundtrack. This is useful for sending a rough mix of your film soundtrack to other members of the production team, for example.
Open the Sound Settings dialog by doing one of the following:
Choose File > Export Audio to Movie from the main menu bar (or use the corresponding key command).
Control-click (or right-click) the global Video track area, and choose Export Audio to Movie from the shortcut menu.

Choose format options for the bounced audio file, and click OK.
In the dialog that appears, enter a name and target folder for the movie, and click Save.
Another dialog opens, allowing you to choose which of the original movie’s audio tracks should be used in the new movie.
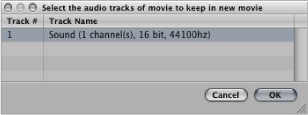
Select the audio track that you want to retain in the new movie, and click OK.
The QuickTime movie is exported to the selected folder; it contains all selected audio tracks, plus the part of your project that is encompassed by the start and end points of the QuickTime movie.