Using the Tempo List
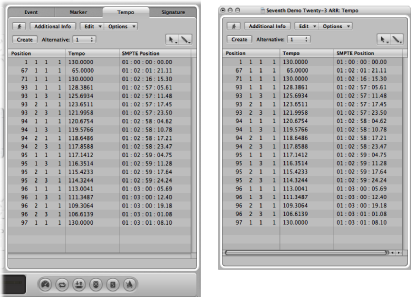
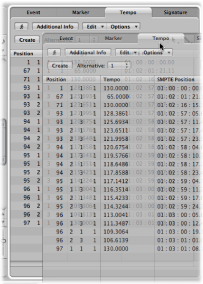
The Tempo List displays all tempo events in your project. You can open the Tempo List as a tab in the Arrange window, or as an independent window.

Click the Lists button at the top-right corner of the Arrange toolbar, and click the Tempo tab (or use the Toggle Tempo List key command, default assignment: T).
Choose Options > Tempo > Open Tempo List (or use the corresponding key command).
Drag the Tempo tab, which changes to the Tempo List window as you drag it.

Creating and Editing Events in the Tempo List
The layout and use of the Tempo List are very similar to those of the Event List. The following section only outlines the most important Tempo List operations. For more information on general (and identical) Event List operations, see Editing MIDI Events in the Event List.
Move the playhead to the desired project position.
Click the Create button, or click below the bottom tempo event with the Pencil tool.
A tempo event (which uses the current project tempo value) appears. You can alter the value in the Tempo column.
Click the tempo event with the Eraser tool.
Select the tempo event, and choose Edit > Delete (or press Delete).
Use the mouse as a slider, or double-click and directly enter values in the Position or SMPTE column.
Use the Pickup Clock (Move Event to Playhead Position) key command.
Set the locators to the passage containing the correct tempo change.
Choose Edit > Select Inside Locators.
Note: When a marquee selection is active, using this key command sets the marquee selection to match the locators.
Copy the tempo events to the Clipboard (default key command assignment: Command-C).
Deselect all tempo events (by clicking the background).
Paste the tempo events from the Clipboard (default key command assignment: Command-V).
The paste position defaults to the current playhead position, but this can be changed. A position input box appears alongside the first of the pasted tempo events, allowing you to alter the bar position. If the first tempo change is not at the start of the bar in the passage, be sure to alter the bar number, and leave the beat, sub beat, and frame or tick values unaltered.
Press Return.
The copied tempo changes are selected, and you can undo the operation if necessary.
Displaying Additional Tempo Information in the Tempo List
Creating a tempo curve can lead to the creation of numerous tempo change events. These tempo change events can be viewed in the Tempo List.
Click the Additional Info button.
All tempo events, including those located on the tempo curve are displayed in the Tempo List.
Using the Shortcut Menu in the Tempo List
Many selection, editing, and other commands can be accessed by Control-clicking (or right-clicking) anywhere in the Tempo List. Use this technique to accelerate your workflow.
Note: Control-click (or right-click) functionality is dependent on the Right Mouse Button: Opens Shortcut Menu option being chosen in the Logic Pro > Preferences > General > Editing pane.
Switching Between Tempo Alternatives in the Tempo List
You can use up to nine different Tempo List variations per project. This is useful in projects with tempo changes, as it allows you to:
Temporarily slow down the tempo when recording MIDI regions
Temporarily disable tempo changes
Try out different tempo variations
Choose Options > Tempo Alternatives, and choose a Tempo List.
Choose a Tempo List from the Alternative pop-up menu.