MIDI Take Recording
You can approach MIDI take recording in the following ways:
- By recording a single MIDI take: Creates a single MIDI region on the selected arrange track.
- By recording multiple MIDI takes: Creates multiple MIDI regions over the same section of the project, all packed into a single take folder.
- By recording additional MIDI takes: Creates a take folder or the addition of new recordings to existing take folders.
Recording a Single MIDI Take
When you record a single MIDI take, a MIDI region is automatically created on the selected arrange track.
Select the instrument or external MIDI track that you want to record on.
Note: These track types are automatically record-enabled when selected.
Set the playhead to the point where you want recording to start.
If you would like to hear the metronome while recording, Control-click (or right-click) the Metronome button in the Transport bar, and make sure the Click While Recording command is chosen in the pop-up menu.
Click the Record button in the Transport bar (or use the corresponding key command, default assignment: *).
You will hear the count-in, if defined in File > Project Settings > Recording.
Stop recording by clicking the Stop button in the Transport bar (or press the Space bar).
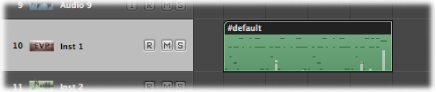
The recording appears as a single MIDI region on the selected arrange track, with the data appearing instantaneously.
While recording, you can change the record track by selecting a new track with the mouse, or using the Select Previous Track or Select Next Track key commands (default assignments: Up Arrow or Down Arrow).
Note: If you paused recording (by clicking the Pause button in the Transport bar), you can resume recording by clicking either the Pause or Play button. Recording resumes at the current playhead position.
Recording Multiple MIDI Takes
You can record multiple takes of a performance over the same section of a project. The first recording appears as a single MIDI region on the selected arrange track, as with single take recording. When a recording occurs over this existing MIDI region, a take folder is created (occupying a single instrument arrange track), and both regions are added to this folder. Each subsequent recording over the same section is added to the take folder.
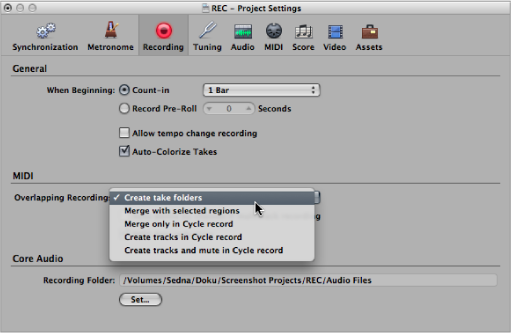
Open the Recording project settings by doing one of the following:
Choose File > Project Settings > Recording (or use the Open Recording Project Settings key command, default assignment: Option-*).
Click the Settings button in the Arrange toolbar, and choose Recording from the pop-up menu.
Control-click (or right-click) the Record button in the Transport bar, and choose Recording Settings from the pop-up menu.
Open the Overlapping Recordings pop-up menu and choose “Create take folders.”
Turn on Cycle mode by doing one of the following:
Click the Cycle button in the Transport bar (or use the Cycle Mode key command, default assignment: C).

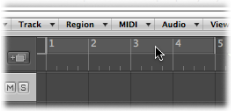
Click in the top part of the Bar ruler.
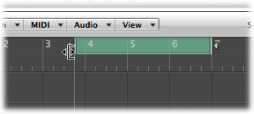
Set a cycle area by doing one of the following:
Drag the left and right locators in the top part of the Bar ruler.
Modify the locator fields in the Transport bar.
Click the Record button in the Transport bar (or use the corresponding key command, default assignment: *).
Record as many cycle passes as you wish. When the second cycle pass ends and the third cycle pass begins, a take folder is created on the arrange track. Each subsequent cycle pass is then added to this take folder.
Note: Each previous take track is automatically muted during recording. When you stop recording, you can listen to the individual takes in the take folder by selecting them.
Stop recording by clicking the Stop button in the Transport bar (or press the Space bar).
The result is a closed take folder that contains each of the recorded MIDI takes on a single arrange track.

Open the take folder by doing one of the following:
Click the disclosure triangle in the top‑left corner of the take folder (or use the Un/disclose Take Folder key command).
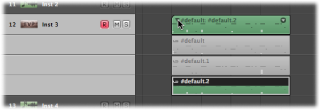
Double-click the take folder.
Recording Additional MIDI Takes
After recording single or multiple MIDI takes to an arrange track, you can continue to record additional takes on the same track.
You can record over an existing region, or regions.
You can record over an existing take folder, or take folders.
Note: You need to choose File > Project Settings > Recording, then open the Overlapping Recordings pop-up menu and choose “Create take folders.”
Recording over Existing MIDI Regions
A take folder is automatically created when you record over an existing MIDI region.
Set the playhead to a position where the new recording will overlap the existing region by a length that exceeds the count-in (which you have set in File > Project Settings > Recording).
Click the Record button in the Transport bar (or use the corresponding key command, default assignment: *).
An overlapping MIDI region is created in real time along the track until you stop recording.
Stop recording by clicking the Stop button in the Transport bar (or press the Space bar).
The result is a closed take folder that contains both MIDI recordings on a single arrange track. The longer of the two regions determines the take folder size.
Recording over multiple existing MIDI regions will merge the regions—per track—before creating the take folder. All existing MIDI regions will appear as the first take, and new recordings will appear as the second take, third take, and so on.
Recording over Existing MIDI Take Folders
Recording over an existing MIDI take folder will add a MIDI take to it.
Recording over multiple existing MIDI take folders will flatten them individually, and merge them per track, before creating a new take folder that spans the combined length of all take folders. All material that existed prior to recording will appear as the first take, with subsequent recordings appearing as the second take, third take, and so on.
Note: All takes that were not playing in the take folders (which existed prior to recording) are lost unless you choose Edit > Undo right away.
Only the actual recording of MIDI events qualifies them as overlapping. For example, imagine that you are recording over existing take folders 1, 2, and 3. You don’t play any MIDI events before the start, or after the end of take folder 2. This will result in the new recording being added as a further take of take folder 2. Logic Pro will even tolerate note-off events in the first bar of take folder 3, without merging take folders 2 and 3.
Note: MIDI take folders do not have the comping functionality available to audio take folders. The MIDI Take Folder pop-up menu does not include the New Comp or “Flatten and Merge” commands.