Record-Enabling Tracks
You can make recordings only on record-enabled—or armed—tracks, irrespective of which arrange track is selected in the track list. There are a number of ways to enable tracks for recording. You can enable tracks individually, or you can enable tracks collectively—if they each have unique inputs. You can also enable several tracks that are routed to the same channel strip. On occasion, you may need to enable audio and MIDI tracks simultaneously. Each track or channel strip has its own Record Enable button, which is used to arm that track or channel strip for recording.
Note: If the Record Enable button is not visible in the track list, choose View > Configure Track Header (or use the corresponding key command), and select the Record Enable checkbox. If this checkbox is selected and the button is still not visible, activate the relevant audio hardware in Logic Pro > Preferences > Audio > Devices.
Record-Enabling Audio Tracks
You can activate the Record Enable buttons only of audio tracks that have a unique input. Simultaneous arming of multiple tracks that use the same input (chosen in the Input slot) is not possible.
If several arrange tracks are routed to the same channel strip (“Audio 1,” for example), the new audio file will be recorded to the selected track (routed to “Audio 1”). If none of these tracks are selected, but they are record-enabled, audio will be recorded to the first (the top) of these tracks.
Space is reserved on the hard disk for armed tracks, which will no longer be available for Undo files. For this reason, Logic Pro automatically disarms audio tracks when you are editing in the Sample Editor, or if the hard disk is nearly full.
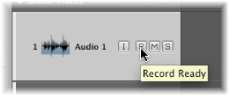
Click the Record Enable button on the desired track (or tracks) in the track list.
Click the Record Enable button on the desired channel strip (or channel strips) in the Mixer.
Select the desired track (or tracks) in the Arrange area and use the Record Enable Track key command, default assignment: Control-R.
Click the (red) Record Enable button a second time—in either the track list or Mixer.
Use the Record Enable Track key command, default assignment: Control-R.
Option-click the (red/flashing) Record Enable button of any record-enabled audio track.
Record-Enabling MIDI Tracks
You can enable one or more software instrument tracks for recording.
Click the Record Enable button on the desired track (or tracks) in the track list.
Click the track header of a software instrument track that is not record-enabled.
Note: This action turns off the record-ready state of any other software instrument tracks that are already record-enabled.
Click the (red) Record Enable button in the track list.
Use the Record Enable Track key command, default assignment: Control-R.
Record-Enabling Audio and MIDI Tracks Simultaneously
There may be occasions when you want to simultaneously record audio and software instrument tracks—perhaps to capture a live band recording with the keyboard player using one or more Logic Pro software instruments.
Important: You can activate the Record Enable buttons only of audio tracks or channel strips that have a unique input.
Click the Record Enable button on the audio tracks you want to record to.
Click the Record Enable buttons on the software instrument tracks you want to record to.