Naming Regions
Identifying regions by name can make arranging much easier. This can be done on a per-region basis, or you can name several regions simultaneously.
Select the Text tool.
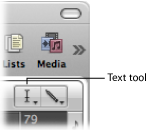
Click a region with the Text tool.
A text input box appears.
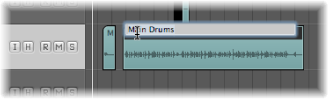
Type in a name and press Return, or click another region or the Arrange area background to exit the text input box.
Double-click the top line of the Region Parameter box in the Inspector.
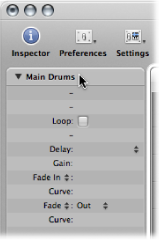
A text input field appears, allowing you to edit the region name.
Type in a name and press Return, or click anywhere outside the text input box.
Select a group of regions (drag to select or Shift-click) with the Pointer tool.
Do one of the following:
Select the Text tool, then click any of the selected regions with the Text tool.
Double-click the top line of the Region Parameter box (displaying x selected, with x indicating the number of selected regions).
A text input box appears.
Type in a name and press Return, or click another region or the Arrange area background to exit the text input box.
All regions are assigned the same name.
Select a group of regions (drag to select or Shift-click) with the Pointer tool.
Do one of the following:
Select the Text tool, then click any of the selected regions with the Text tool.
Double-click the top line of the Region Parameter box (displaying x selected :x indicates the number of selected regions).
A text input box appears.
Type in a name, ending with a number.
Press Return or click another region or the Arrange area background to exit the text input box.
All selected regions are assigned the same name, but are incrementally numbered.
Select a group of regions (drag to select or Shift-click) with the Pointer tool.
Do one of the following:
Select the Text tool, then click any of the selected regions with the Text tool.
Double-click the top line of the Region Parameter box (displaying x selected: x indicates the number of selected regions).
A text input box appears.
Type in a name, ending with a number followed by a space.
Press Return or click another region or the Arrange area background to exit the text input box.
All selected regions are assigned the same name and end with the same number. This is useful for identifying takes made on a particular date; for example, bassline 030806.
You can name regions after the track on which they are placed.
Select the track name in the track list.
All regions on the track are automatically selected.
Choose Region > Name Regions by Tracks/Channel Strips (or use the corresponding key command, default assignment: Shift-Option-N) in the Arrange area.
The track name is assigned to all selected regions.