Adjusting Plug-in Parameters
This section briefly describes common parameter elements you will find in Logic Pro plug-in windows. Full details on the parameters of each individual plug-in can be found in the Logic Pro Instruments and Logic Pro Effects manuals.
Click the button.

It switches to the next or previous option, or will be turned on or off.
Drag the slider vertically or horizontally.
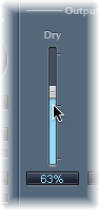
Command-click anywhere in the slider’s value range to set it to the clicked value.
Drag the rotary knob vertically.
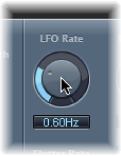
Command-click anywhere in the value circle surrounding the knob to set it to the clicked value.
Drag the field’s numerical value vertically.
Click (or double-click) in the numerical field, then type a new value using your computer keyboard.
If there are up and down arrows alongside such panels, click them to increment or decrement the value by one step.
If the numerical panel opens a pop-up menu of values, choose one.
Option-click the parameter.
Hold down the Shift key before dragging a control.
You can also use the mouse wheel to adjust Logic Pro plug-in parameters.
Select a Logic Pro plug-in parameter by clicking it.
Move the mouse wheel.
Tip: You can also use the trackpad of any portable computer instead of the mouse wheel.