Open a plug-in window (when it’s closed)
Click the center area of the plug-in slot.
You edit plug-in parameters in the plug-in window, which opens automatically when you insert a plug-in.
Note: You can turn off this behavior by deselecting the “Open plug-in window on insertion” checkbox in the Logic Pro > Preferences > Display > Mixer pane.
The header area at the top of a plug-in window is common to all plug-ins. You can use it to adjust the size of the window, link plug-in windows when more than one is open, switch the plug-in parameter view, and route side chain signals.
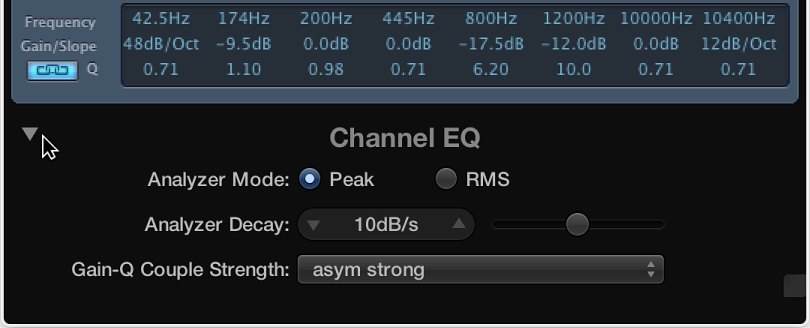
Some plug-ins have additional parameters that don’t appear in the main plug-in window. In this case, a disclosure triangle appears at the bottom-left corner of the plug-in window.
Click the center area of the plug-in slot.
Click the close button at the top-left corner of the plug-in window.
Do any of the following:
To adjust a slider: Drag it vertically or horizontally. You can Command-click anywhere in the slider’s value range to set it to the clicked value.
To adjust a rotary knob: Drag it vertically. You can Command-click anywhere in the value circle surrounding the knob to set it to the clicked value.
To adjust a numerical field: Drag its numerical value vertically. You can also double-click in the numerical field, then type a new value using your computer keyboard.
To reset any parameter to its default (or centered) value: Option-click the parameter.
To make finer parameter adjustments: Hold down the Shift key before dragging a control.
Click the icon at the top-right corner of the plug-in window.

Do one of the following:
Drag any corner of the plug-in window.
Choose a window size from the plug-in window’s View menu.
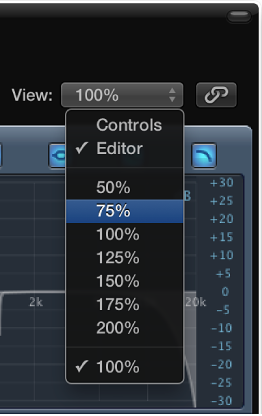
Both of these scalings apply to individual plug-ins.
Choose Editor or Controls from the plug-in window’s View pop-up menu.
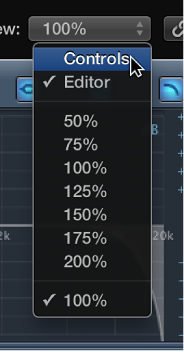
Editor view shows the plug-in’s graphical interface, if it offers one. Controls view displays all plug-in functions as a set of horizontal sliders, with numerical fields to the left of each parameter. These fields are used for both the display and entry of data.
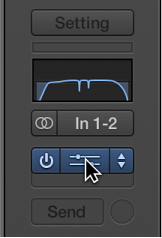
Click the Link button to the right of the plug-in window header.
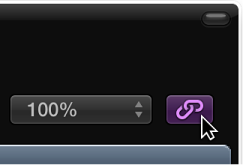
When linked, a single plug-in window is used to display all open plug-ins. Each time you open a new plug-in, the window updates to reflect the newly chosen plug-in.
Click the instrument channel strip’s Send slot, then choose an unused bus from the pop-up menu.
An aux channel strip is created.
Click-hold the Output slot of the aux channel strip, then choose No Output from the pop-up menu.
The output signal of the aux channel strip, which you don’t want to hear, is turned off.
Open the plug-in from the instrument channel strip.
Choose the newly created aux channel strip from the plug-in’s Side Chain pop-up menu.
The plug-in processes the audio of the aux channel strip chosen in the Side Chain pop-up menu, and not the audio of the instrument channel strip that the plug-in is inserted into.
Click the disclosure triangle at the bottom-left corner of the plug-in window.