A zone is a location into which a single sample—or audio file, if you prefer this term—can be loaded. The sample loaded into the zone is memory resident—it uses the RAM of your computer. A zone offers parameters that control sample playback. Each zone enables you to determine the Key Range—the range of notes that the sample spans—and the Root Key—the note at which the sample sounds at its original pitch. In addition, Sample Start, End, and Loop points, Volume, and several other parameters can be adjusted for the zone. You can define as many zones as needed.
Choose Zone > New Zone (or use the New Zone key command).
A new zone entry appears in the Instrument Editor.
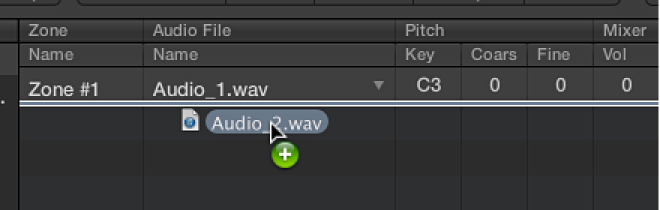
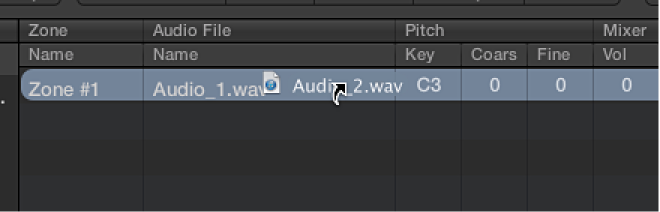
Do one of the following:
Double-click the empty area in the Audio File column.
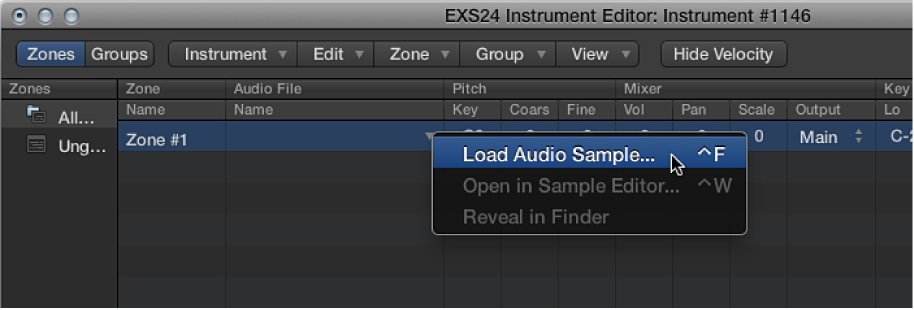
Click the arrow in the Audio File column, then choose Load Audio Sample from the pop-up menu.

Locate the audio file you want and select it.
If you select the “Hide used audio files” checkbox, files used in the currently loaded sampler instrument are dimmed.
If you select the “Preview audio file in EXS Instrument” checkbox, the sample files in the currently selected zone are temporarily replaced. The zone is not directly triggered by selecting this option, but it can be triggered by playing MIDI notes while the file selector is open—and different files are chosen. The selected sample can be heard as part of the zone, inclusive of all synthesizer processing (filters, modulation, and so on).
To loop playback of the currently selected sample file, click the Play button.
Click the Play button a second time to stop playback.
Click the Play button, then step through the files using the Down Arrow key, or by clicking them, to audition each file in turn.
When you find a sample you want to use, click the Open button to add it to the zone.
When the sample is loaded, the sample name is displayed in the Audio File Name field.
Drag an audio file onto one of the keys of the onscreen keyboard.
The start key, end key, and root key are all set to the note that the file was dragged to. Dragging works for audio files from the following sources: Browser, Project Audio Browser, and the Finder.
Drag an audio file directly into the zone area to create a new zone.

The root key for the zone is the key at which the sample is played at its recorded pitch. This information is written in the sample header. If no root key is defined in the sample header, the C3 key is used by default.
Note: If you drag an audio file onto an existing zone, the file referenced by that zone is replaced with the new, dropped file. The pointer changes to reflect the replace mode.

Dragging a single sample into the empty area below Ungrouped Zones creates a default zone and a default group, with the new default zone placed in the default group.
Choose Zone > Load Multiple Samples in the Instrument Editor (or use the Load Multiple Samples key command).
Browse to the source files location, then use the Add or Add All button to select the samples you want to use.
Click Done.
Choose one of the three automatic mapping modes in the dialog that appears:

“Auto map” by reading the root key from audio file: Uses the root keys stored in the audio file headers, and places the samples, as zones, across the keyboard range. The number of keys that constitute a zone is intelligently determined by the placement of neighboring zones.
“Drums” zone without range, root key from audio file: Uses the root keys stored in the audio file headers. Each zone is mapped to a single key on the keyboard—as determined by the root key information.
Contiguous zones: Ignores all root key information and maps the samples across the keyboard in chromatic order. The Zone Width field allows you to specify the width—the key range—of the newly generated zones. The Start Note field defines the start note of newly generated zones.
You can also load multiple samples by dragging them into the Instrument Editor. Dragging multiple samples into a group folder assigns the samples to the respective group. Dragging multiple samples below the Ungrouped Zones area assigns the audio files to a new default group.
Note: If you drag multiple files onto one of the keyboard keys, the dialog does not include the Start Note field, because the start key, end key, and root key are all set to the note that the file was dropped on.