You can easily create a formatted list with bullets, letters, or numbers.
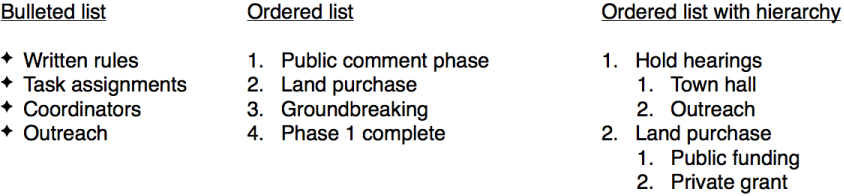
Simple lists can use a bullet, letter, or number at the beginning of each line.
Ordered lists, such as outlines, can have levels of indented lists within them to show hierarchy. They can also use bullets, letters, or numbers at the beginning of each line.
Tiered lists, such as those used in legal documents, are ordered lists that can use different numbering styles for each level.
Click Text ![]() in the toolbar.
in the toolbar.
A text box is added to your slide.
Select text that you want to format as a list, then choose an option from the
With the text box selected, in the Text pane of the Format inspector, choose a list from the Bullets & Lists pop-up menu.
You may need to click the Style button in the Text pane to see the pop-up menu.
Click the text box, type the first item in your list, then press Return and continue adding items.
To change the indent level (hierarchy) of an item in the list, click and drag its bullet, number, or letter.
Move an item to the right: Press Tab or drag its bullet to the right.
Move an item to the left: Press Shift-Tab or drag its bullet to the left.
Move an item up or down: Drag up or down.
Press Return twice to end the list.
Keynote automatically detects when you’re creating a list. To turn this feature off, go to Keynote > Preferences (from the Keynote menu at the top of your computer screen). In the General pane, deselect “Automatically detect lists.”
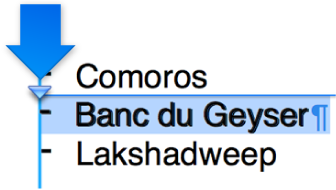
You can drag items in a list to a different level in the hierarchy or to a different indentation level.
Select the item you want to move by clicking its bullet, number, or letter.
Drag the item to the left or right, or drag it up or down in the list, until you see the blue arrow.
Select the lines of text with the bullet you want to change.
In the Text pane of the Format inspector, click the Style button.
Click the Bullets & Lists disclosure triangle, then choose a different bullet type from the pop-up menu below Bullets & Lists subhead. Do one of the following:
For text bullets: Choose a different bullet type (scroll to see all of them) from the Bullets pop-up menu.
For image bullets: Click the Current Image button, then choose an image bullet style.
To use your own image, click Custom Image, then choose the image file on your computer.
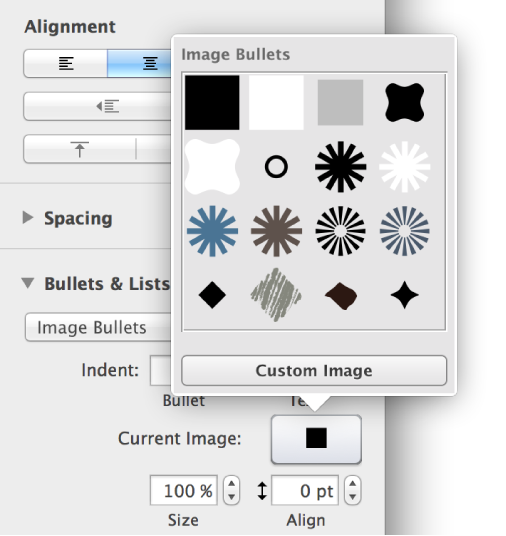
Use the other controls in the Bullets & Lists section to change the size of the bullets and adjust the amount of space between text and bullets.
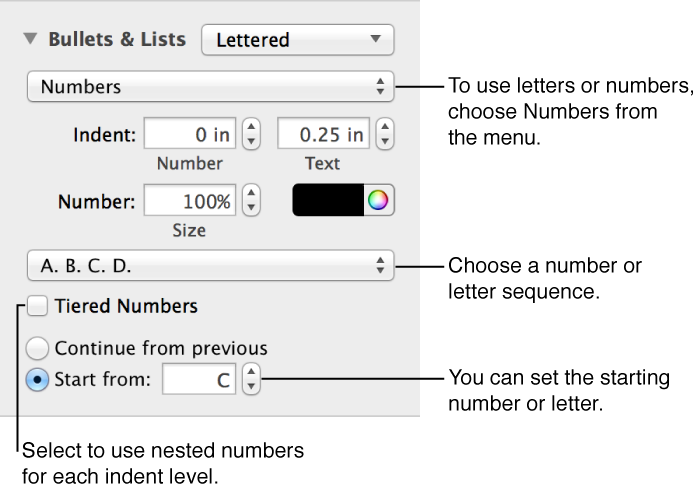
You can use numbers, letters, Roman numerals, or a combination to designate levels of hierarchy in an ordered list.
Select the lines of text with the numbering you want to change.
In the Text pane of the Format inspector, click the Style button.
Click the disclosure triangle next to Bullets & Lists, then choose an option.
To start numbering from a different point, select “Start from” then enter a number or letter.
Create a list style to apply the same formatting–bullet type, spacing, font size, for example–to multiple lists in your presentation.
Click the list you want to base the new style on.
In the Text pane of the Format inspector, click the list style pop-up menu (next to Bullets & Lists).
Click ![]() at the top of the pop-up menu.
at the top of the pop-up menu.
Enter a name for the new style, then click outside the menu to close it.
These styles are similar to paragraph styles—you can assign a shortcut to it, rename it, and more. To learn more about what you can do with styles, see Use paragraph styles.