View photos in a shared photo stream
Select iCloud in the Source list.
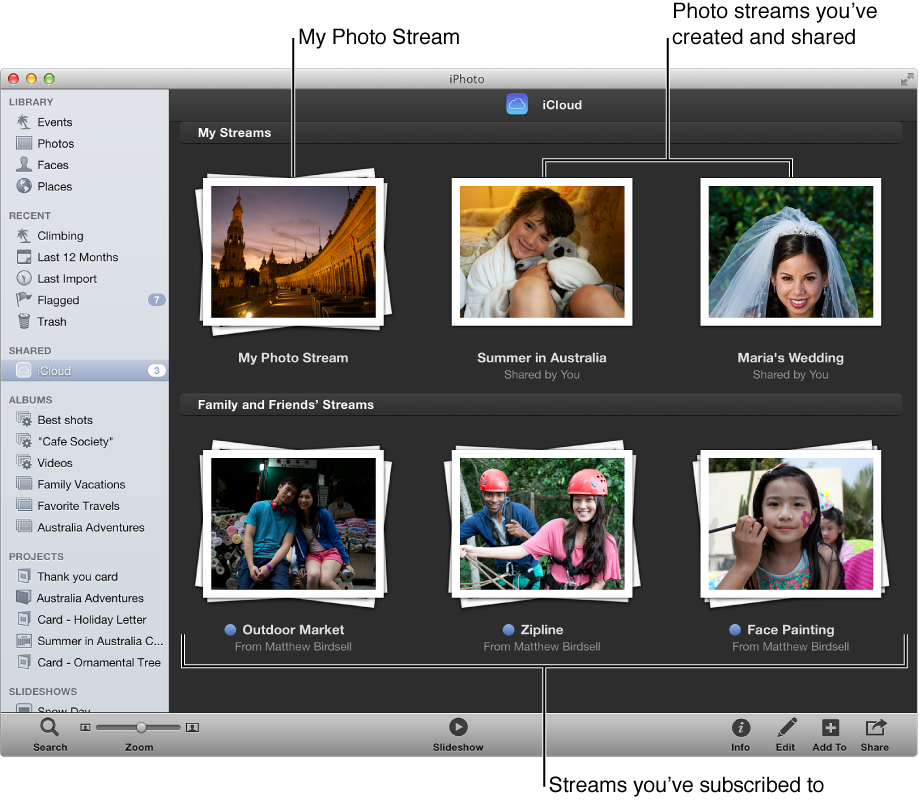
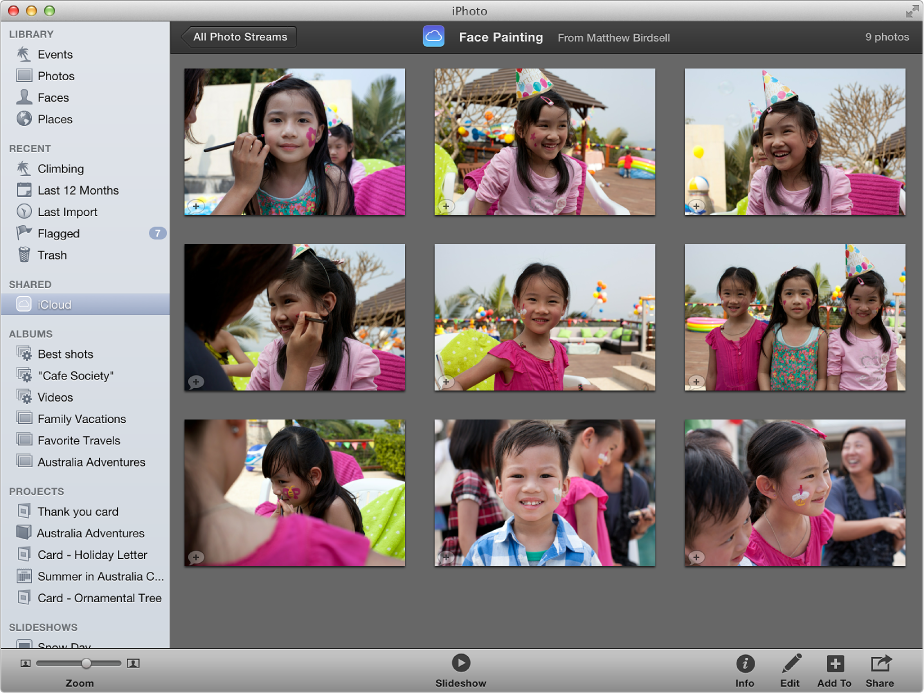
To view the contents of a photo stream, double-click its thumbnail.
It’s easy to create a photo stream to share your photos and video clips. You can also view the items you’ve already shared.
Select the items you want to share.
Do one of the following:
Click the Share button in the toolbar, click iCloud, and click “New photo stream.”
Drag the items to iCloud in the Source list, and click “New photo stream.”
The New Photo Stream dialog appears.
In the “To” field, type the email addresses for your invitees.
To enable your invitees to access the shared photo stream from an iOS device, you must provide the email addresses associated with their iCloud accounts.
In the Name field, type a name for the photo stream.
If you want invitees to be able to post their own photos and video clips to the stream, select the Subscribers Can Post checkbox.
If you want to share your photo stream with someone who doesn’t have an Apple device, select the Public Website checkbox.
Note: People who view your shared photo stream on the web cannot comment on the items. They also cannot view the comments posted by you or by others who subscribe to your shared photo stream with an Apple device. If you would like someone who doesn’t have an Apple device to see the first comment added to an item, you must post the comment first, before inviting the person to view the shared stream.
Click Share.
Your invitees are sent an email and a notification asking them to subscribe to your shared photo stream.
Select iCloud in the Source list.
To view the contents of a photo stream, double-click its thumbnail.
If you want to stop sharing a photo stream, all you have to do is delete it.
WARNING: When you delete a shared photo stream, it’s immediately removed from your subscribers’ devices. If you think your subscribers might want to keep some of the photos or video clips, you should alert them to save the items before you delete the shared photo stream.
Select iCloud in the Source list.
Select the photo stream you want to stop sharing, and press Command-Delete.