Arrange photos on a book page

You can arrange photos on a page by zooming in on a photo. You can also reorder photo frames on a page, and use a photo as the background for a book page.

Zoom in on a photo

  1. Click the book name in the Source list.

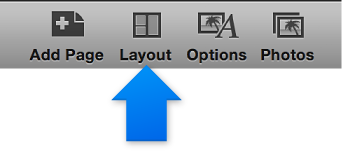
  2. Double-click the page that contains the photo.

  3. Select the photo that you want to zoom in or out on.

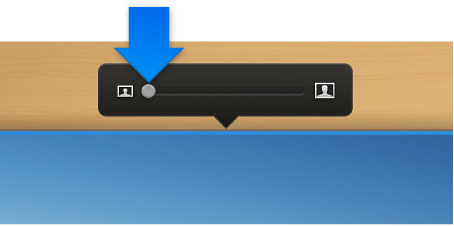
  4. Drag the zoom slider that appears above the photo.

    Image of the photo zoom slider
  5. Drag the photo up, down, left, or right to reposition it in the photo frame.

Fit a photo to the frame size

For some themes, you can set iPhoto to display the entire photo within a photo frame on a book page. Blank edges may appear on the long sides of the photo so that the widest portion of the photo can fit within the frame.

  1. Click the book name in the Source list.

  2. Double-click the page that contains the photo you want to resize to fit within the frame.

  3. Control-click the photo, and choose “Fit Photo to Frame Size” from the shortcut menu.

Note:  The "Fit Photo to Frame Size" command is not available for all themes.

Move a photo frame forward or backward on a page

Some page layouts use overlapping photo frames. You can arrange overlapping photo frames by moving them forward and backward.

  1. Click the book name in the Source list.

  2. Double-click the page that contains overlapping photos to view its page spread.

  3. Press the Control key while you click a photo, and then choose “Move to Front” or “Send to Back” from the shortcut menu.

Use a photo as the background on a book page

You can use a photo as the background for text or other photos on any book page except a book’s cover.

  1. Click the book name in the Source list.

    The book pages appear in All Pages view.

  2. Click the Layout button in the toolbar.

    Image of the Design button
  3. Double-click the page that you want to add the background photo to.

    The page spread appears with the page selected.

  4. In the Layout pane, select the photo background swatch (with a stylized image) from the available Background swatches.

    Image of the photo background swatch

    The background of the page shows a stylized image.

  5. Click the Photos button in the toolbar to view the Photo pane.

  6. Locate the photo you want to use and drag the photo thumbnail to the page.

  7. Adjust the background photo by doing any of the following:

    • To zoom in on the background photo, select the page to make the zoom slider and opacity slider appear, drag the zoom slider, and then drag the photo up, down, left, or right.

      Image of the zoom slider and opacity slider
    • To adjust the background photo’s transparency, select the page to make the zoom slider and opacity slider appear, and then drag the opacity slider to make the photo more or less transparent.

    • To make other changes to the background photo, for example, to add a border and apply effects to it, or edit it with the iPhoto editing tools, make sure the page is selected, and then click the Options button in the toolbar to view the design tools.