
Amp Designer provides seven virtual microphone types. After choosing a cabinet, you can set the type of microphone to emulate and place the microphone, relative to the cabinet.
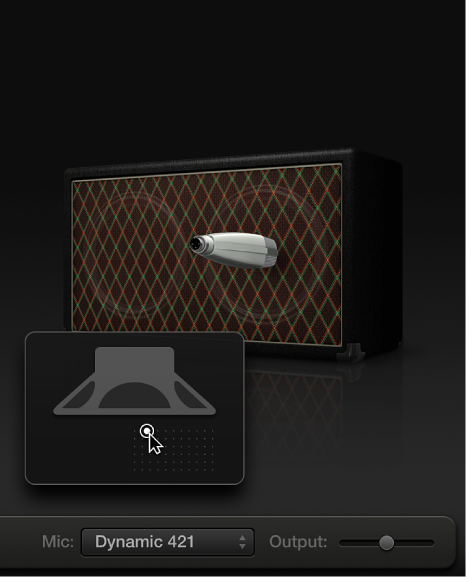
The Mic pop-up menu is near the right end of the black bar. The microphone placement graphic appears when you move your pointer in the area above the Mic pop-up menu.
By default, the microphone is placed in the center of the speaker cone (called on-axis). This placement produces a fuller, more powerful sound, suitable for blues or jazz guitar tones. If you place the microphone on the rim of the speaker (called off-axis), you obtain a brighter, thinner tone, making it suitable for cutting rock or R&B guitar parts. Moving the microphone closer to the speaker increases bass response.
Choose a microphone model from the Mic pop-up menu, located below the cabinet graphic.
Condenser models: Emulate the sound of high-end studio condenser microphones. The sound of condenser microphones is fine, transparent, and well balanced. Choose from Condenser 87 and Condenser 414.
Dynamic models: Emulate the sound of popular dynamic cardioid microphones. Dynamic microphones sound brighter and more cutting than Condenser models. The mid-range is boosted, with softer lower-mid frequencies, making dynamic microphones a good choice for rock guitar tones, and useful if you want guitars to cut through other tracks in a mix. Choose from Dynamic 20, Dynamic 57, Dynamic 421, and Dynamic 609.
Ribbon 121: Emulates the sound of a ribbon microphone, a type of dynamic microphone that captures a sound often described as bright or brittle, yet still warm. It’s useful for rock, crunch, and clean tones.
Tip: Combining multiple microphone types can produce an interesting sound. Duplicate the guitar track and insert Amp Designer on both tracks. Select different microphones in each Amp Designer instance while retaining identical settings for all other settings, then set track levels.
Move the pointer over the area below the cabinet graphic to show the microphone placement grid.
Drag the white dot in the grid to change the microphone position and distance from the cabinet.