
You can use the cycle area to repeatedly play a particular part of a project. The cycle area can be used for composing, practicing a part before recording, recording multiple takes, and other purposes.
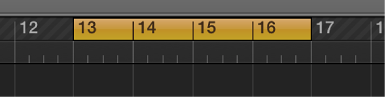
When Cycle mode is on, the cycle area is displayed as a yellow strip in the upper part of the ruler (or in the center, when the secondary ruler is visible). When Cycle mode is turned off, the cycle area is no longer visible.
Do one of the following:
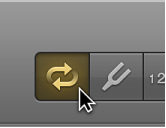
Click the Cycle button in the control bar (or press C).
Click the top part of the ruler.
Drag left or right in the top part of the ruler.
The cycle area appears as a yellow strip in the ruler, and Cycle mode is turned on.
Grab the yellow cycle strip by the middle (the pointer turns into a hand) and drag it horizontally.
Do one of the following:
Grab the left or right edge of the cycle area to move the start or end point.
Shift-click a position in the ruler.
This action works even when the cycle area isn’t visible, or Cycle mode is turned off.