Install Windows on your Mac without using a USB hard drive or flash drive

Depending on the model of your Mac, you might not need an external USB drive to install Windows (you’re asked for one when you prepare your Mac for Windows if it’s required).

To find out which versions of Windows your Mac supports, see the Apple Support article System requirements to install Windows on your Mac using Boot Camp.

What you need

Before you begin

Before you install Windows, make sure you back up important files.

You can use Time Machine or several other methods to back up your files. For information about backing up files, in the Finder, choose Help > Mac Help, then search for “back up.”

Do the following tasks in order.

Check for software updates

Before you install Windows, install all OS X updates.

  1. Log in as an administrator on your Mac, quit all open apps, then log out any other users.

  2. Choose Apple menu > App Store, click Updates, then install all available updates.

    If your Mac restarts after installing an update, choose Apple menu > App Store again to install any additional updates.

Get a Windows ISO image

You need to create or download a Windows ISO image of the full-install, 64-bit version of Windows.

Do one of the following:

Prepare your Mac for Windows

Boot Camp Assistant helps prepare your Mac for Windows by creating a new partition for Windows, then starting the Windows installer.

Important: If you’re using a portable Mac, connect it to a power source before continuing.

  1. Open Boot Camp Assistant, located in Launchpad > Other.

  2. At the Introduction screen, click Continue.

    If the Select Tasks step appears, you need to use a USB flash drive or hard drive to install Windows. Follow the instructions in Install Windows on your Mac using a USB hard drive or flash drive.

  3. In the Install Windows step, click Choose, then select the ISO image you downloaded from Microsoft or created from a Windows installation DVD.

  4. When you’re asked to create a Windows partition, specify a partition size by dragging the divider between the OS X and Windows partitions.

    Note: You can’t resize the partition later.

    If you need help determining the best size for your Windows partition, refer to the Windows installer documentation.

  5. Click Install.

    Boot Camp Assistant creates a Windows partition named BOOTCAMP, restarts your Mac, then opens the Windows installer.

Install Windows

Follow these instructions to install Windows on your Mac.

  1. In the Windows installer, follow the onscreen instructions.

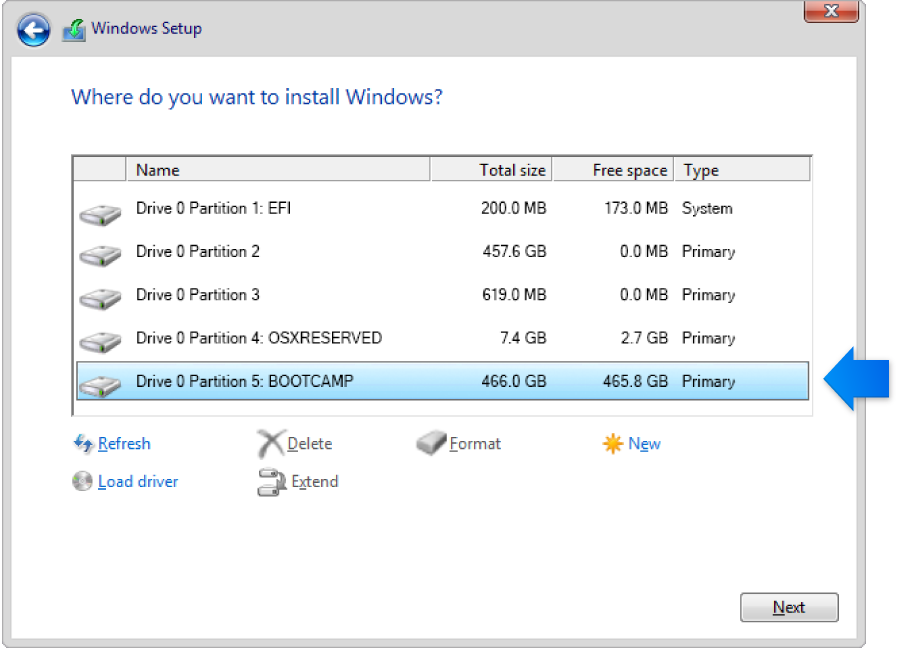
  2. When you’re asked where to install Windows, select the BOOTCAMP partition (you may need to scroll through the list of partitions to see it).

    WARNING: Do not create or delete a partition, or select any other partition. Doing so may delete the entire contents of your OS X partition.

    Windows Installer graphic. Where do you want to install Windows screen with BOOTCAMP partition selected. Drive options (advanced) is an available option.
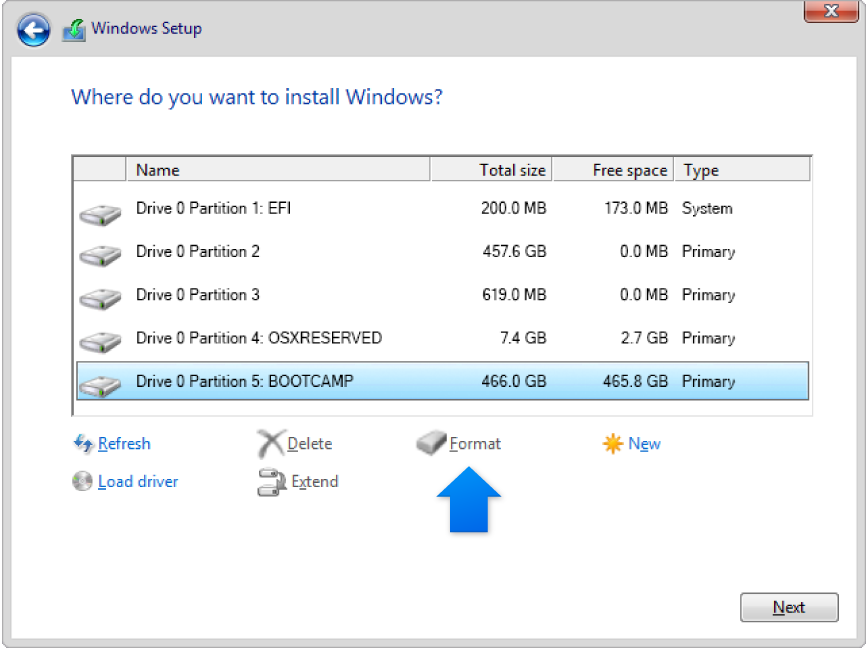
  3. If you see “Drive options (advanced)” below the list of partitions, click it. Otherwise, proceed to step 4.

  4. Click Format, then click OK.

    Windows Installer graphic. Where do you want to install Windows screen with BOOTCAMP partition selected. Format is an available option.
  5. Click Next.

    The installer formats the Windows partition using the NTFS file system.

  6. Follow the onscreen instructions to finish installing Windows.

    After you install the Windows software, your Mac automatically restarts using Windows.

  7. Use the Windows setup screens to configure Windows.

Install Windows support software

After installing Windows, Boot Camp drivers that support your Mac hardware start installing.

  1. Follow the onscreen instructions.

    Important: Do not click the Cancel button in any of the installer dialogs.

    If a message appears that says the software you’re installing has not passed Windows Logo testing, click Continue Anyway.

    You don’t need to respond to installer dialogs that appear only briefly during installation, but if a dialog asks you to install device software, click Install.

    If nothing appears to be happening, there may be a hidden window that you must respond to. Look behind open windows.

  2. When the support software finishes installing, click Restart, then click Yes.

  3. After your Mac restarts, follow the instructions for any other installers that appear.

  4. Check for updated Windows support software. In OS X, choose Apple menu > App Store, click Updates, then install all available updates..

See also

Boot Camp Apple Support website