Work in Viewer mode in full-screen view

When you first enter full-screen view, Viewer mode is shown. Viewer mode is similar to the Split View layout in the Aperture main window; however, the photos are displayed in high resolution against a solid background. You navigate through your photos using the filmstrip.

View a photo in the filmstrip

  1. If necessary, position the pointer over the area of the window where the filmstrip is docked (bottom, left, or right side) to display the filmstrip.

  2. Select a photo displayed in the filmstrip by pressing the arrow keys or clicking the photo you want to see.

View more than one photo at the same time

  1. Choose Show Multiple from the Viewer Mode pop-up menu in the toolbar.

    Figure. Viewer Mode pop-up menu in the Full Screen view toolbar.
  2. Position the pointer over area of the window where the filmstrip is docked (bottom, left, or right side) to display the filmstrip and do one of the following:

    • Command-click nonadjacent photos to select them.

    • Shift-click images to select a range of photos.

Show and move the filmstrip

You can choose to always show the filmstrip, so that Aperture automatically fits the photos and filmstrip on your screen without overlapping, or you can hide it, so that it appears only when you place the pointer over the area where it’s docked.

You can also move the filmstrip to the left, bottom, or right side of your main display.

Search for a photo in the filmstrip

When you have more photos than the filmstrip can display at once, you can use the search field in the filmstrip to quickly locate photos. The search is confined to the selection in the Library pane of the Inspector HUD.

Aperture finds the relevant photo or photos for you, removing others from view. To see all your photos again, click the search field’s Reset button (with an X) or delete the text in the search field.

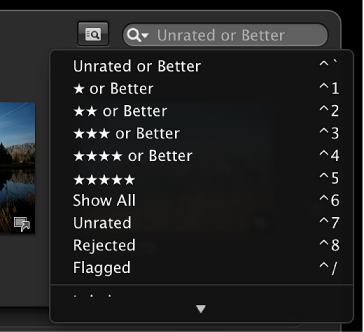
Important:  You can use keyboard shortcuts to quickly implement a search that displays photos with specific ratings or photos that have a specific keyword. It’s possible, while working with photos, to accidentally press such a keyboard shortcut and see photos on your screen unexpectedly change or even disappear. If this happens, you can display your photos by clicking the Reset button in the search field to reset the search criteria in the Filter HUD.

Set the filmstrip to filter photos

By default, the filmstrip is set to show photos that are unrated or better. Any photos that have been assigned the Reject rating are automatically removed from view. To view rejected photos, you must set the filmstrip to show all photos.

Figure. Full Screen view search field pop-up menu.

You can also filter the photos shown in the filmstrip by criteria other than ratings. For example, you can filter photos by whether they’ve been flagged or assigned a color label.

View the full-screen view toolbar

The toolbar displayed in full-screen view is similar to the toolbar in the Aperture main window. You use the toolbar’s buttons and tools to make image adjustments and to control your displays.

You can have the toolbar always appear on the screen by clicking the Always Show Toolbar control in the toolbar.

Figure. Full Screen view toolbar showing the Always Show Toolbar control.