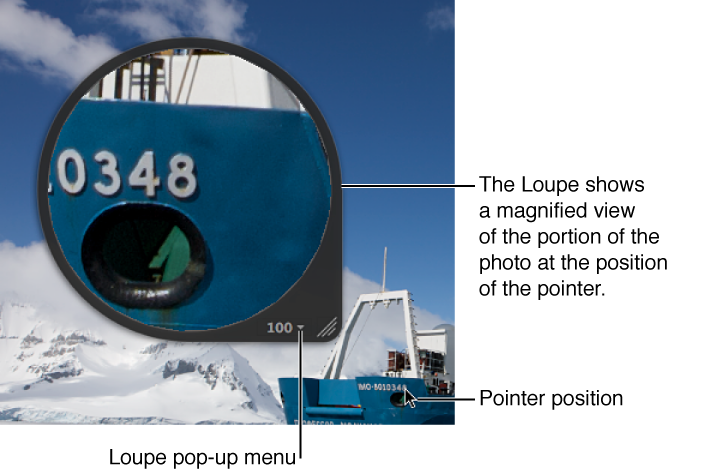
You can magnify a portion of a photo by placing the Centered Loupe over it. You can also leave the Loupe stationary and set it to magnify the portion of the photo at the position of the pointer. Using the pointer to magnify the photo is useful when you don’t want the Loupe to cover part of the photo.
You can change the size of the Loupe and increase or decrease its magnification level. You can also have the Loupe display a photo as a grid that shows the actual pixel composition of the photo, allowing you to see the individual pixel values at high magnification (400 percent or higher). You can also set the Loupe to display readings of the color values of a photo, showing the RGB (%), RGB (8-bit), Lab, CMYK, HSB, or HSL values chosen for the Color meter.
To show the Loupe: Choose View > Show Loupe, or press the Grave Accent key (`).
To hide the Loupe: Choose View > Hide Loupe, or press the Grave Accent key (`).
You can also show or hide the Loupe by clicking the Loupe button in the toolbar.
Do one of the following:
Drag the Loupe’s handle.
Drag within the Loupe.
A circle appears that targets the area to be magnified.
Hold down the Grave Accent key (`) while clicking a specific place in a photo.
The Loupe moves to the part of the photo you clicked.
Choose Focus on Cursor from the Loupe pop-up menu.
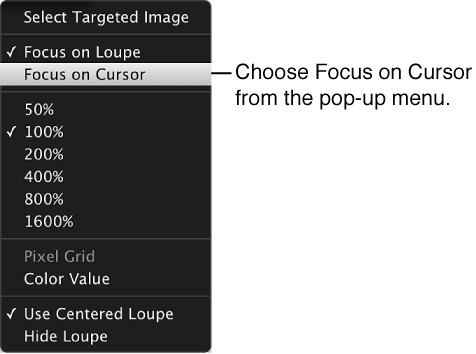
To turn off this feature, choose Focus on Loupe from the Loupe pop-up menu.
You can change the size of the Loupe and increase or decrease its magnification level.
To increase the size of the Loupe: Choose View > Loupe Options > Increase Diameter, or press Option–Shift–Plus Sign (+).
You can also drag the resize control on the Loupe’s handle.
To decrease the size of the Loupe: Choose View > Loupe Options > Decrease Diameter, or press Option-Shift-Underscore (_).
You can also drag the resize control on the Loupe’s handle.
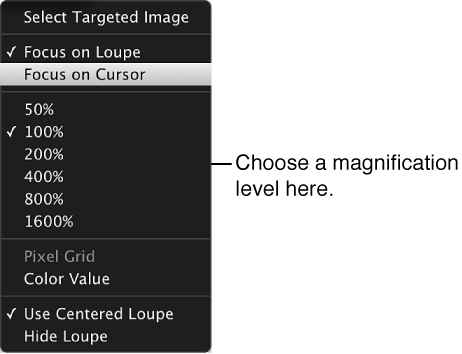
To change to a specific magnfication level: Choose a magnification level from the Loupe pop-up menu.
To increase the Loupe’s magnification incementally: Choose View > Loupe Options > Increase Zoom, or press Shift–Command–Plus Sign (+).
Press these keys repeatedly to continue increasing the magnification.
To decrease the Loupe’s magnification incrementally: Choose View > Loupe Options > Decrease Zoom, or press Shift-Command-Underscore (_).
Press these keys repeatedly to continue decreasing the magnification.
To create smooth changes in magnification: Use the scroll gesture.
Set the Loupe’s magnification to 400 percent or higher.
Do one of the following:
Choose View > Loupe Options > Show Pixel Grid in Loupe.
Choose Pixel Grid from the Loupe pop-up menu.
To turn off this feature, choose the menu item again.
Do one of the following:
Choose View > Loupe Options > Show Color Value in Loupe, or press Option-Shift-Tilde (~).
Choose Color Value from the Loupe pop-up menu.
To turn off this feature, choose the menu item again.
In the Adjustments inspector or the Adjustments pane of the Inspector HUD, choose a color value option from the Adjustment Action pop-up menu ![]() .
.
For more information, see Sample color values and display camera information.