The Apple Qmaster Interface
The Apple Qmaster application described in this document is one part of the larger distributed processing system described in The Apple Qmaster Distributed Processing System. The Apple Qmaster application is the client software you use to submit jobs and batches to the system. Both this application and the larger system are known by the same name (Apple Qmaster).
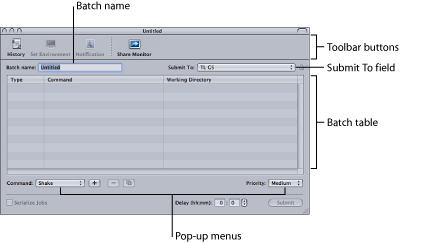
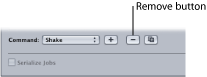
The Apple Qmaster window contains a toolbar; a Batch Name field; a Submit To field; the Batch table; buttons to add, remove, and submit jobs (dimmed until at least one job is in the Batch table); and pop-up menus to choose job types and batch priority.
Toolbar Buttons
The Apple Qmaster toolbar contains the following buttons.
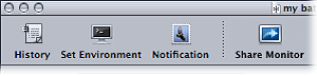
- Notification: Opens a dialog where you can set (or reset) an email address to which the status of a batch completion or failure can be sent. Apple Qmaster does not currently support SMTP servers that require authentication. The following list shows the processing service type followed by the notification label used in the emails and logs:
- Local Compressor service: servicecontroller:com.apple.stomp.transcoder
- Distributed Compressor service: servicecontroller:com.apple.stomp.transcoderx
- Distributed Apple Qmaster service: servicecontroller:com.apple.qmaster.executor
Batch Table
This is the large middle area of the Apple Qmaster window that lists the individual jobs in a batch.
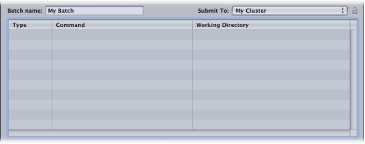
The Batch table includes the following columns.
Text Fields and Pop-Up Menus
Around its periphery, the Apple Qmaster window includes other important interface elements for creating and submitting jobs and batches.
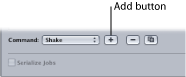
- Command pop-up menu: Use this pop-up menu to create commands.
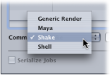
You can choose one of the following types of jobs.
- Generic Render: For more information, see Submitting Batches with the Generic Render Command.
- Maya: For more information, see Submitting Maya Batches.
- Shake: For more information, see Submitting Shake Batches.
- Shell: For more information, see Using Apple Qmaster to Submit UNIX Commands.
- Priority: Use this pop-up menu to set the relative priority (urgency) for a batch. This pop-up menu allows you to set the priority level (High, Medium, or Low) of a batch, relative to other batches. It defaults to Medium. High-priority batches get processed before medium-priority and low-priority batches.

- Delay: Use these text fields to set a delay in hours or minutes for any job in the batch. Click in either text field (left field = hours, right field = minutes) to enter the corresponding value. Click the arrows to step through minutes in increments of 5 at a time, or, if the Hour text field is selected, in increments of 1 hour at a time.


Apple Qmaster Preferences
You can use the Apple Qmaster Preferences window to adjust how Apple Qmaster works with remote computers.
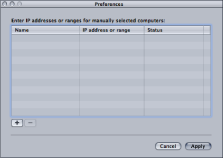
About the Apple Qmaster Preferences Window
The Apple Qmaster Preferences window includes the following items.
Setting Apple Qmaster Preferences
Follow the instructions below to set Apple Qmaster preferences.
Click Add (+).
The host address dialog appears.
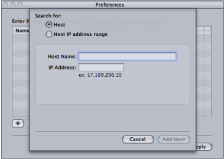
In the host address dialog, do one of the following:
Select Host, complete the Host Name and IP Address fields, and click Add Host.
Select “Host IP address range,” complete the Range fields, and click Add Range.
The hosts or host ranges appear in the Host table in the main Preferences window.
Important: Any changes you make to the Apple Qmaster preference settings take effect only when you click Apply. If you make changes but decide not to use them, click Cancel.