Customizing the Score Editor’s Appearance
Various options are available for changing the general appearance of the Score Editor. The different view modes can accelerate editing, or are required for particular operations.
Choosing a Color Mode
The settings in the Score Editor’s View > Colors menu determine the color mode for the active Score Editor window. These settings have priority over all other color settings.
- Normal: Colors are assigned in accordance with the color settings in staff styles and note attributes. As long as these settings haven’t been changed in new projects, the result is a regular black-and-white printout, and black notes on a yellow background onscreen.
- Show Pitch: Applies colors in accordance with note pitches. The colors of notes can be edited in the Layout > Colors window. This window also allows you to determine whether notes with accidentals match the color of those without accidentals, or if each note in the chromatic scale has its own color.
- Show Velocity: Applies eight different colors, in accordance with MIDI velocity. These colors can also be edited in the Layout > Colors window.
- Show Voice Assignment: Assigns different colors to different voices. This only makes sense in staff styles that contain more than one voice. This mode employs the colors of the user palette, which can also be found and edited in the Layout > Colors window.
- Force Black & White: Does exactly what the name implies. This mode is useful when color options have been used in staff styles, or have been assigned to notes using note attributes, but you want to print a regular black-and-white score and then return to the colored display.
Displaying Folders
If the current display level allows more than one MIDI region to be viewed simultaneously (linked or unlinked), the View > Explode Folders setting affects how things are shown. Unlike the other editors, the Score Editor can display (or even print) the contents of different display (Folder) levels at once.
If the current display level contains folders, their contents are also displayed in the score.
Note: If this setting is not selected, folders appear as gray beams in Linear Score view, and aren’t shown at all in Page Score view.
Displaying Global Tracks
Choose the View > Global tracks setting to view the global tracks in the Score Editor. You can only choose this setting in Linear Score view. The Configure Global Tracks command allows you to choose which global track types are shown.
Displaying Instrument Names
Choose the View > Instrument Names setting to show the names of (used) track instruments, to the left of the score display.
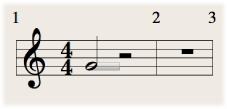
Displaying Duration Bars
You can show a graphical representation of a note’s duration by displaying duration bars in the Score Editor.
Choose View > Duration Bars, then choose one of the following display modes:
- Off: Turns off all duration bars.
- Selected Notes: Turns on duration bars for selected notes only.
Note: Duration bars for selected notes are displayed according to the Selection Color setting in Logic Pro > Preferences > Score.
- All Notes: Turns on duration bars for all notes.
Note: You can also use the Toggle Duration Bar Display key command, which toggles between Off and the last selected display mode.
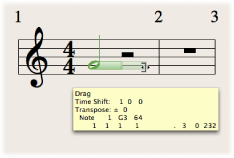
Changing the Length of Duration Bars
You can change the length of duration bars displayed in the Score Editor.
Place the pointer over the end point of the duration bar, then drag horizontally when the pointer turns into the length change icon.
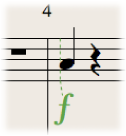
Displaying Guide Lines
You can show an object’s exact time position by displaying guide lines in the Score Editor (show exactly the relation of symbols, staves, and time positions).
Choose View > Guides, then choose one of the following display modes:
- Off: Turns off guides.
- Dragged Objects: Turns on guides while dragging objects.
- Selected Objects: Turns on guides for selected objects only.
Note: Guide lines for selected notes are displayed according to the Selection Color setting in Logic Pro > Preferences > Score.
- All Objects: Turns on guides for all objects.
Note: You can also use the Toggle Guide Lines Display key command, which toggles between All Objects and the last selected display mode.