Setting the Project Sample Rate
You should set the required sample rate when starting a project. The sample rate is the number of times per second the audio signal is sampled. Recording at a sample rate of 44.1 kHz is recommended for most situations.
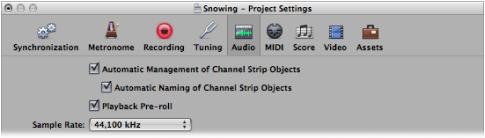
Choose File > Project Settings > Audio (or use the Open Audio Project Settings key command, default assignment: Option-P), and choose the desired sample rate in the Sample Rate pop-up menu.
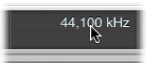
Click the Sample Rate display in the Transport bar, and choose the desired sample rate from the pop-up menu.
Note: If you can’t see the Sample Rate display, you need to either turn off the Autopunch button in the Transport bar or select the “Sample Rate or Punch Locators” checkbox in the Customize Transport Bar dialog. To select the checkbox, control-click (or right-click) the Transport bar, choose Customize Transport Bar from the shortcut menu, select the “Sample Rate or Punch Locators” checkbox, then click OK.
When you add audio files to your project, their sample rate is automatically matched to the project sample rate—if the “Convert audio file sample rate when importing” option is selected in the File > Project Settings > Assets tab.