Creating Crossfades and Fades on Audio Regions
You will often create fade ins or fade outs on audio regions, including Apple Loops audio files, or use crossfades to smoothly segue between two adjacent (or overlapping) audio regions on a track.
The latter type of fade, the crossfade, can be performed automatically on overlapping audio regions using Logic Pro.
Choose the X-Fade setting from the Drag pop-up menu. (See Using Drag Modes.)
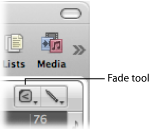
You can also create crossfades manually—as well as fade ins and fade outs—using the Fade tool, the Fade parameters in the Inspector’s Region Parameter box, or the shortcut menu of an existing fade area.
Tip: You should make use of both methods, as each has advantages. When combined, the process of creating and editing fades is quicker and easier.
You can simultaneously adjust the fade parameters for all selected audio regions.
Note: These fade parameters are nondestructive (they don’t change the original audio file), as opposed to the fade functions available in the Sample Editor.
Creating Fades
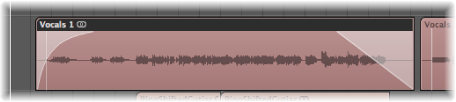
A fade in starts at the beginning of an audio region, and a fade out occurs at the end of the region. Fades are only visible if you are sufficiently zoomed in to see the waveform in the audio region. You can either use the Fade tool or the parameters in the Inspector’s Region Parameter box to create fades.
Select the Fade tool.
Do one of the following:
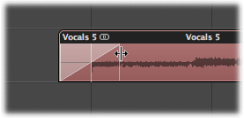
Drag over the start or end point of an audio region.

This creates a fade in or fade out. The length of the fade drag area determines the length of the fade, so a longer drag area results in a longer fade time, and a shorter drag area, a quick fade.
Drag over the end point of one audio region and the start point of the following region.

This works, even if the two sections don’t directly adjoin each other.
Select one or more regions.
Set the value for the Fade In or Fade Out setting in the Region Parameter box. Use the mouse as a slider, or double-click and type in the value.
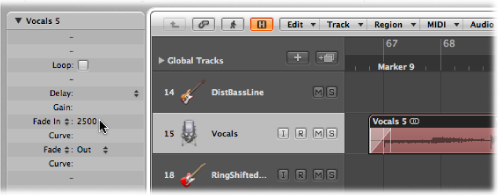
As you do so, a fade is created at the beginning or end of the selected regions.
Note: The fade value determines the length of the fade, so a higher value results in a longer fade time, and a lower value, a shorter fade.
Editing and Deleting Fades
You can change an existing fade, the fade curve shape, the fade type, and the fade playback speed. You can also delete fades.
Changing an Existing Fade
You can change an existing fade with the Fade tool, or by modifying the parameters in the Inspector’s Region Parameter box.
Drag over the start or end point of a fade with the Fade tool.
Select a region, then edit the Fade In or Fade Out value in the Region Parameter box.
When you change an existing fade, the curve shape of the previous fade is retained.
Changing the Fade Curve Shape
You can change the fade curve shape with the Fade tool, or by modifying the parameters in the Inspector’s Region Parameter box.
Drag the curve line with the Fade tool.
Select a region, then edit the Curve value in the Region Parameter box.
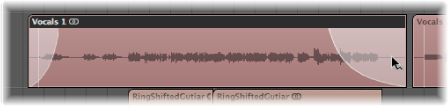
In the example below, a positive curve is shown for both the fade in and fade out.
In the example below, a negative curve is shown for the fade in, and a linear fade (no curve) is shown for the fade out.
Changing the Fade Type
You can choose between four different fade types, in the Inspector’s Region Parameter box or in the Arrange area:
- Out (Fade Out): Creates a standard fade out whenever the Fade tool or Fade parameter is used.
- X (Crossfade): Crossfades the selected region with the following region when you use the Fade tool or Fade parameter.
- EqP (Equal Power Crossfade): Results in an Equal Power crossfade. This minimizes volume dips between audio regions, resulting in a more even crossfade between regions that may be slightly different in level.
- X S (S-Curved Crossfade): Delivers an S-curved crossfade. The fade curve, as the name suggests, is S shaped.
Open the Fade Type pop-up menu in the Region Parameter box, then choose a fade type.
Control-click (or right-click) the fade or crossfade, then choose a fade type from the shortcut menu.
Note: The latter three options can only be applied to two consecutive regions. Also note that the Fade In (and corresponding Curve) parameters are made redundant when any of the X, EqP, or X S options is chosen.
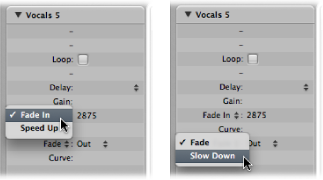
Changing the Fade Playback Speed
Logic Pro offers Speed Up and Slow Down parameters in the Inspector’s Region Parameter box or in the shortcut menu of an existing fade area, allowing you to speed up or slow down the playback speed of fades. In the Region Parameter box, the Speed Up and Slow Down parameters share pop-up menus with the Fade In and Fade parameters.
Choose the Speed Up parameter, and modify the value accordingly.
Choose the Slow Down parameter, and modify the value accordingly.
Deleting a Fade
You can delete a fade with the Fade tool, or by modifying the parameters in the Inspector’s Region Parameter box.
Control-click an existing fade area, then choose Remove Fade from the shortcut menu.
Option-click an existing fade area with the Fade tool.
Set the Fade In or Fade Out parameter in the Region Parameter box to 0.