Getting to Know the Arrange Area
The Arrange area provides a visual overview of your project structure. It shows when audio and MIDI regions start to play, and their duration. You control when and how regions play by moving, cutting, copying, resizing, and joining them in the Arrange area.
Regions are positioned horizontally—on track lanes that run from left to right in the Arrange area. Their positions along these lanes determine when they play, aligned with the Bar (and Time) ruler along the top of the window.
The track lanes are stacked vertically, creating a grid of track lanes and particular bar or time positions.
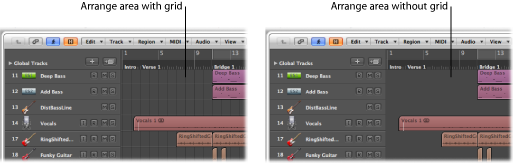
Choose View > Grid in the Arrange area’s local menu bar (or use the corresponding key command, default assignment: Control-G).
You can enhance the grid contrast by altering the color of the Arrange area background.
Open the Display preferences by doing one of the following:
Choose Logic Pro > Preferences > Display (or use the Open Display preferences key command).
Click the Preferences button in the Arrange toolbar, then choose Display from the pop-up menu.
Click the Arrange tab, then choose Bright from the Background Color pop-up menu.

Alternately, choose Custom from the pop-up menu, then click the color field to the right.
In the Colors window that opens, create a custom color by using the color palette wheel and contrast and opacity sliders.
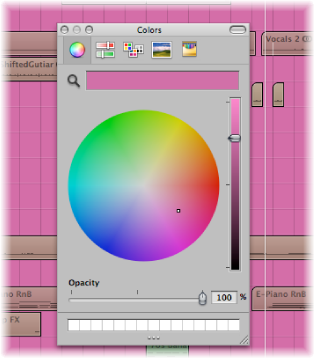
Click the close button at the top-left corner of the window to close the Colors window and assign your custom Arrange area background color.