Working with Channel Strip Configurations
Channel strip settings (CST files) are channel strip–type specific. Put another way, instrument channel strips feature a number of instrument settings (or presets), such as Bright Pop Piano and Hard Flanging Clav, separated into instrument, GarageBand, and Jam Pack categories. Audio channel strips offer effect routings optimized for particular instrument, vocal, and other processing tasks. Similarly, output and auxiliary channel strips provide channel strip settings for particular mastering or sweetening processes.
Loading or Removing Entire Channel Strip Configurations
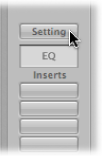
The Library tab in the Media area allows you to load multiple plug-ins (inclusive of their parameter settings) into a channel strip. You can also do the same thing by clicking the Setting button at the top of channel strips.
You can use this function in a number of ways, such as:
Setting up and storing complex multi-effect configurations, on any type of channel strip
Setting up particular routing configurations for use with multi-output software instruments
Copying a routing or effect configuration between projects
Rapidly creating new project templates
Click the Setting button at the top of a channel strip.
A menu appears, displaying all channel strip settings available for the channel strip type.
Note: Option-clicking the Setting button displays all channel strip settings available for all channel strip types (shown at the bottom of the menu).
Browse to and select the setting by clicking its name.
Select the arrange track whose channel you want to use.
Click the Library tab in the Media area.
The Library displays all channel strip settings available for the selected track or channel strip, sorted into category menus.
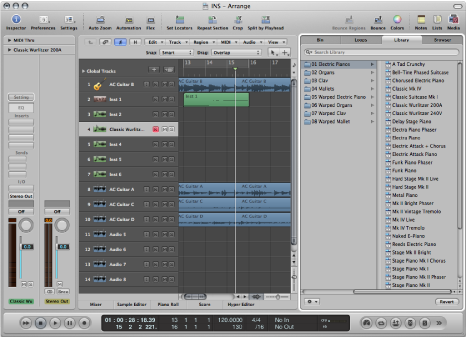
Browse through the category menus, then click the setting name to insert all associated plug-ins into the selected channel strip.
Click the Revert button at the bottom of the Library tab.
Click the Setting button at the top of a channel strip, then choose Previous or Next Channel Strip Setting from the menu.
Use one of the following key commands:
Next Channel Strip Setting of selected Track
Previous Channel Strip Setting of selected Track
Next Channel Strip or Plug-in Setting or EXS Instrument
Previous Channel Strip or Plug-in Setting or EXS Instrument
The previous or next channel strip setting shown in the list is loaded. This feature is handy when trying to find the right delay or clavinet sound, for example.
Click the Setting button at the top of a channel strip, then choose Delete Channel Strip Setting from the menu.
Click the Setting button at the top of the channel strip, then choose Reset Channel Strip from the menu.
Copying, Pasting, and Saving Channel Strip Configurations
You can copy and paste, reset, and save channel strip configurations.
Click the Setting button at the top of the channel strip, then choose Copy or Paste Channel Strip Setting from the menu, as applicable.
You can also use the Copy Channel Strip Setting and the Paste Channel Strip Setting key commands.
Note: When you paste channel strips (instead of loading them), the Level fader, Panorama Send Level, and all routing destinations are also set according to the channel strip setting in the Clipboard.
Click the Setting button at the top of the channel strip, then choose Save Channel Strip Setting As from the menu (or use the corresponding key command).
In the dialog that appears, select the appropriate sub-folder (if applicable), and type in a name for the channel strip setting.
As there are different classes of channel strips, a number of channel strip–type specific sub-folders are available in the Channel Strip Settings folder. These sub-folder structures are reflected in the Settings menu for each type of channel strip.
Do not attempt to change the Channel Strip Settings folder structure. However, you can create a new folder, and save into it. If no folder is selected, the saved channel strip setting is shown directly in the Channel Strip Setting menu, below the functions.
You can remotely switch between channel strip settings by sending MIDI program change messages. This allows you to select your favorite sounds (consisting of a complete channel strip setting that can contain a software instrument and effect plug-ins) by pushing a button on your MIDI keyboard. This feature is named channel strip performances, and is designed for live use of Logic Pro.
Important: Only program change messages sent on MIDI channel 1 will switch between channel strip performances. All program change messages sent on other MIDI channels are forwarded to Audio Units instruments, if applicable.
Channel strip performances can be used for all audio channel strip types. They are saved in the Performances sub-folder (in ~/Library/Application Support/Logic/Channel Strip Settings/Channel Strip name). The performance names start with the corresponding program change number (for example, 001Piano, 045FlangeGuitar, 111ArcoCelloHall). There are 128 performances (corresponding to 128 available program change events).
Configure a channel strip that you want to have available as a performance (by opening a channel strip setting from the factory library and making changes according to your needs, for example).
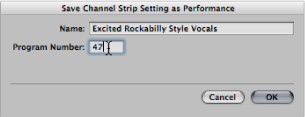
Click the Setting button at the top of the channel strip, then choose Save as Performance from the menu.
In the dialog that appears, enter a performance name, choose a program change number, and click OK.
Send the program change number from your MIDI controller.
When a channel strip receives a program change message (on MIDI channel 1) that corresponds to an assigned performance number, it loads this performance.
Note: If an unassigned program change value is sent, the channel strip ignores the message, and the currently loaded channel strip performance setting remains in place.
All saved performance settings appear in the Performances folder of the Channel Strip Settings menu.
